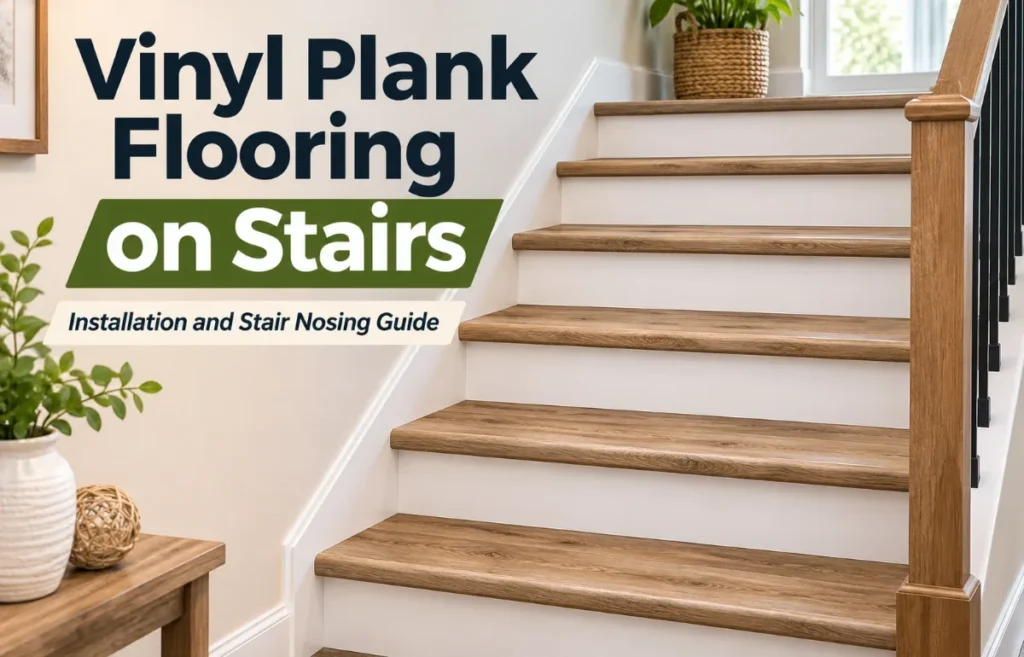
Vinyl plank flooring on stairs is a way to cover stair treads (the surfaces you walk on) and risers (the vertical faces) with luxury vinyl planks, usually finished with a purpose-made stair-nose profile at each front edge. It creates a continuous wood-look or stone-look finish between rooms and staircases without using solid wood.
Unlike planks on a flat floor, however, stair pieces generally need to be permanently bonded to a solid base. The nosing must also fit securely and preserve a safe, consistent step shape. Done properly, the result is attractive and easy to clean; done carelessly, a loose edge can become a serious trip hazard.
I like the look of a staircase that matches the adjoining floor, but I would never select a plank color before checking the stair-nose options. On stairs, the edge detail controls the entire installation.
Is Vinyl Plank a Good Choice for Stairs?
Luxury vinyl plank (LVP) can be a practical choice for indoor stairs. Its wear layer resists everyday scuffs, and routine cleaning usually takes less effort than maintaining carpet. Many collections convincingly imitate oak, walnut, and other wood grains.
Still, waterproof planks do not make the whole staircase waterproof. Water can reach seams, exposed edges, or the wood beneath. A textured surface may improve footing compared with a very smooth finish, but no decorative texture guarantees slip resistance.
The biggest compromise is feel. LVP tends to sound and feel harder than carpet, especially when installed over a hollow or squeaky staircase.
If someone in the household struggles with balance, I would recommend a stair-rated traction treatment or carpet runner before choosing looks alone.
Which Vinyl Stair System Works Best?
| Stair finish | Main advantage | Main consideration |
|---|---|---|
| LVP with matching flush stair nose | Clean, nearly continuous tread surface | Requires an exact compatible nosing profile |
| LVP with manufacturer-approved overlap nose | May suit certain transition details | Raised lip may be unsuitable or prohibited on individual steps |
| One-piece vinyl stair tread or cap | Integrated front edge with fewer visible seams | Often costs more; measurements must be precise |
I generally favor a compatible flush nose or an integrated tread on a full flight. An overlap molding that works where a floating floor meets the top step is not automatically appropriate on every tread.
Why Stair Nosing Is the Most Important Detail
Stair nosing is the protective front edge of a stair tread. It covers the point where shoes repeatedly land, protects the exposed edge of the vinyl, and helps define the step.
Without a compatible nose, a cut plank edge may chip or lift. Trying to bend a rigid vinyl board around the front of a step is not a reliable substitute for an engineered profile.
Flush-Mount Versus Overlap Stair Nosing
A flush-mount stair nose meets the plank at approximately the same walking height. It gives a streamlined appearance and avoids an unnecessary raised strip when the system is installed correctly.
An overlap nose extends over the adjoining plank. Some manufacturers design these primarily for floating-floor transitions, while others publish special stair assemblies.
For example, LifeProof’s instructions for its Zamma flush-nose system specifically prohibit overlap nosing on individual treads. CALI discusses overlap profiles under different conditions. I would follow the exact instructions for the chosen product, not a general video.
Some brands also offer a full vinyl tread with an integrated square or rounded nose. That can reduce visible joints, although it does not remove the need for proper adhesion and a sound stair structure.
Plan the Staircase Before Buying Planks
Every step deserves individual measurements. Older staircases are rarely perfectly square, and one tread can be wider or deeper than the next.
Measure the width at the front and back of each tread, the tread depth, riser height, and the existing nosing projection. A stair tread template or stair jig helps transfer awkward angles onto the new pieces.
I would also make a simple numbered cut sheet. Record each tread and riser separately, including which side touches a wall or an exposed stringer.
This small bit of planning prevents the classic mistake of cutting twelve identical pieces for twelve slightly different steps.
Check the Finished Rise, Not Just the Existing Rise
Here is an overlooked issue: new flooring changes stair geometry.
Suppose a 6 mm covering is installed on the treads but the upper landing receives a thicker floor assembly. The first and last risers can end up feeling different, even when the middle steps look identical.
The solution is to compare finished surface heights across the entire flight before adhesive is opened.
For a U.S. reference, the 2024 International Residential Code includes stair-nosing rules in Section R318.7.5.3: on typical residential stairs requiring a projection, nosings generally extend 3/4 to 1 1/4 inches, with an exception for treads at least 11 inches deep. It also limits variation between nosing projections within a flight.
Local adopted codes, existing-building provisions, and stair designs can differ, so verify requirements with the local building authority.
Changing an old bullnose or building out a riser may also change tread depth. If that work alters the stair structure or railing attachment, I would involve a qualified stair carpenter.
Materials and Tools Worth Having Ready
The essentials are compatible vinyl planks or stair treads, matching stair-nose pieces, approved adhesive, suitable substrate-repair materials, a tape measure, square, stair jig, cutting tools, and a hand roller or pressure tool specified by the manufacturer.
Keep a vacuum and adhesive cleanup supplies nearby.
A fine-tooth saw often makes clean cuts in rigid vinyl moldings, while some planks can be scored and snapped. Check the product instructions before cutting: core construction varies.
Buy the nosing first or confirm its availability before ordering the flooring.
For waste, allow extra material for angled cuts, pattern matching, and errors rather than relying only on the staircase’s square footage. One spare nose or tread may prove more useful than a box of leftover short offcuts.
How to Install Vinyl Plank Flooring on Stairs Correctly
The sequence below explains the work involved, but the selected manufacturer’s installation sheet always takes priority. Different systems specify different adhesives, fastening methods, and assembly orders.
1. Remove Old Coverings and Inspect the Steps
Take off carpet, tack strips, staples, loose trim, and incompatible floor coverings. Remove adhesive residue as required, without sanding or disturbing materials that may contain asbestos or lead in older homes.
Check each step for movement, rot, cracks, protruding fasteners, and squeaks.
Vinyl is a finish, not a structural repair. A flexible tread can eventually break the adhesive bond or open a joint at the nose.
2. Make the Substrate Flat, Clean, and Dry
Vacuum thoroughly, secure loose wooden components, and repair damaged surfaces using products approved for the substrate. Flatten high spots and fill low areas as directed.
Do not glue over carpet padding or assume an attached acoustic pad is suitable for stair bonding. The manufacturer must specifically allow the complete assembly.
Moisture problems need attention before the stairs are covered.
3. Resolve Existing Bullnose and Riser Geometry
Many older wooden stairs have a thick, rounded front lip. Some vinyl systems require that projection to be cut flush with the riser; others permit the riser to be built out to create a square edge.
Neither approach should be improvised.
Review the chosen stair-nose cross-section, measure the resulting tread depth, and check code compliance before cutting. A new face panel must be secure, not just a thin strip hiding empty space.
4. Dry-Fit the Riser, Tread, and Nose Together
I would mock up one complete step before cutting the entire flight. Hold the riser panel against the vertical face, fit the nose at the front, and place the tread plank behind it.
Check that the visible joint is even, the nose has full support, and the walking surface is free of unexpected lips.
On narrow steps, the nose consumes usable plank depth, so measure the plank from the installed nose to the next riser rather than from the original wooden edge.
Mark the back of every piece with its step number. This matters when two cuts differ by only a fraction of an inch.
5. Bond the Riser Pieces
Depending on the system, installation may begin at the bottom riser. Cut each panel to fit without forcing it against uneven trim.
Spread or apply only the adhesive approved for that product, following the required coverage, open time, and surface preparation.
Press the riser evenly in place and roll it where instructed.
Avoid adhesive blobs that leave unsupported areas. A riser can look flat from a distance while still having hollow spots that later release.
6. Install the Stair Nose and Tread
Dry-fit the stair nose again, then secure it exactly as its instructions require.
Some profiles are adhesive-only; particular systems call for adhesive plus approved mechanical fasteners on wooden stairs. Never drive nails through a vinyl component unless the manufacturer specifically permits it.
Fully bond the tread plank where required, align it against the compatible nose, and apply the specified pressure.
A click-lock plank used on a room floor is not meant to be left floating independently on a stair.
Keep joints tight and flush where the system calls for it. If adhesive squeezes onto the finished face, remove it promptly with an approved cleaner.
Do not use caulk as a substitute for securing a loose nosing.
7. Check Each Step Before Moving Upward
Sight along the front edges to spot crooked noses. Feel each transition with your hand for raised corners, gaps, or rocking pieces, then verify that the nose is adequately supported.
Complete the remaining steps using the approved sequence.
Protect the staircase from traffic until the adhesive has cured. A LifeProof stair addendum, for example, specifies 24 hours before use for that particular assembly; other products may require a different period.
Special Stair Details That Need Extra Attention
Top Landings and the First Step
The top landing often has floating LVP while the individual stairs are glued. That junction requires a transition compatible with both systems, without pinning a floating floor in a way that prevents its intended movement.
At the bottom, compare the finished first-riser height with the others. An uneven first or last step is particularly easy to misjudge.
Open-Sided Stairs and Winders
An exposed stair side may need a returned nosing, finished side panel, or a purpose-made cap.
Ordinary straight molding can leave an awkward raw edge. Winders and curved steps introduce changing widths and tread geometry; I would use a professional familiar with those profiles.
White Risers or Matching Wood-Look Risers?
Matching vinyl risers create a continuous wood-look staircase. White-painted risers offer contrast and may make individual steps easier to distinguish, though paint needs cleaning and occasional touch-ups.
Whichever look I choose, I would make sure the nosing remains visually readable under the staircase’s normal lighting.
A beautiful uniform finish should not make the step edges difficult to see.
What Does Vinyl Plank Flooring on Stairs Cost?
Stairs are often quoted per step rather than per square foot because each tread needs individual cutting, bonding, and nosing work.
For broad U.S. planning, a straightforward vinyl-plank stair installation may run roughly $60–$150 or more per finished step, depending on region, product, prep, and labor. Published installer estimates and cost models vary considerably.
Complex open-side details can push the figure higher. That is a budgeting range, not a local quote.
Ask installers to separate the plank or stair-cap price, nosing, risers, old-covering removal, substrate repairs, adhesive, and labor.
A low quote without a matching stair nose can become expensive once the missing parts are added.
The smartest budget comparison is the total for a completed, safe staircase—not the shelf price of the planks.
Common Installation Mistakes I Would Avoid
Using Any Stair Nose That Looks Close Enough
Similar colors do not mean the profiles fit. An incompatible height or attachment method can create movement at the busiest edge.
Leaving Click-Lock Planks Floating
A stair is not a connected room-sized floor. Each piece needs the manufacturer-approved permanent attachment.
Ignoring the First and Last Risers
New layers on landings can produce inconsistent finished step heights even when the middle treads match.
Covering Squeaks and Damage
New vinyl will not strengthen a cracked wooden tread or remove movement underneath.
Rushing the Cure Time
Walking on freshly bonded nosing can disturb the bond before it reaches working strength.
Keeping Vinyl Stairs Looking Good
Sweep or vacuum grit regularly with a hard-floor-safe attachment. Wipe spills promptly using a lightly damp mop and the cleaning product recommended for your vinyl.
Avoid soaking seams, applying wax, or using abrasive pads. Watch for peeling edges or movement at the nose, and stop using an affected step until it is repaired.
If extra traction is needed, select a stair-compatible solution that will not damage the finish or interfere with the stair profile.
I would test any strip or treatment on a spare piece first.
Frequently Asked Questions
Can you put vinyl plank flooring on stairs?
Yes, if the specific flooring system permits stair use and the planks are securely installed with compatible stair nosing.
Do vinyl plank stairs need stair nosing?
Usually, yes. A compatible nose protects the exposed edge and helps create the required tread profile; local code and product details determine the exact design.
Can you use click-lock vinyl plank on stairs?
Some click-lock products can be used on stairs, but the individual pieces generally must be bonded rather than left floating. Check the exact installation and warranty instructions.
Should I install the riser or tread first?
It depends on the product system. Some instructions begin with the bottom riser, then dry-fit and install the nose and tread.
Is vinyl plank flooring slippery on stairs?
It can be, especially with socks or moisture. Choose an appropriate textured finish and consider approved traction options where needed.
Final Thoughts
Vinyl plank flooring on stairs can create a polished, consistent look, but the success of the job depends less on the plank pattern than on the substrate, nosing, and finished step dimensions.
Before buying anything, I would choose an approved stair system, check every measurement, and confirm the installation and warranty requirements. If the nose detail or stair geometry is uncertain, ask a qualified installer to evaluate the flight before work begins.