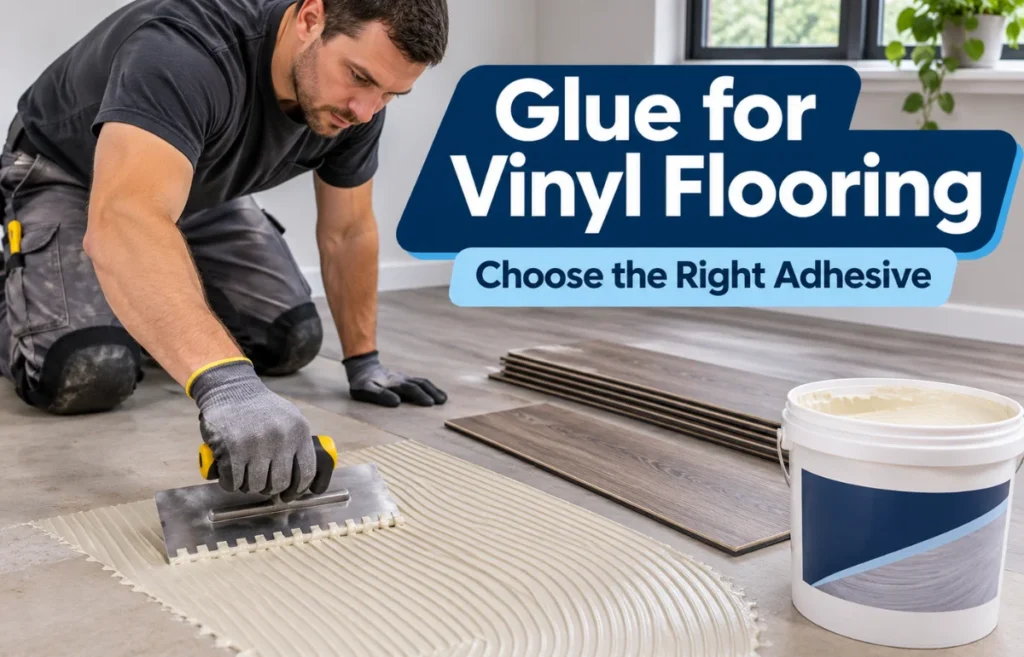
Glue for vinyl flooring is a specially formulated adhesive that bonds glue-down vinyl planks, tiles, or sheets to a prepared subfloor. Unlike ordinary household glue, it is designed to grip resilient flooring while accommodating the demands of foot traffic, cleaning, and temperature changes. The correct product depends on the flooring’s construction, its backing, the subfloor, and the installation method. A pressure-sensitive adhesive might suit one luxury vinyl plank, while a wet-set adhesive or a specialized hard-set formula is required for another.
I would never choose flooring glue based on the word “vinyl” alone. That shortcut can lead to lifting edges, visible seams, or bubbles. The better approach is to identify the exact flooring product first, then match it with an adhesive approved by its manufacturer. Here’s how I narrow down the options without overcomplicating the job.
Why the Right Vinyl Flooring Adhesive Matters
Vinyl is flexible, but that doesn’t mean every adhesive can handle its movement. Planks and tiles can experience small dimensional changes as temperatures fluctuate. Chair wheels, rolling appliances, and heavy furniture add sideways forces that test the bond.
Some vinyl products also contain plasticizers, ingredients that help keep the material flexible. An incompatible glue may soften or lose adhesion when exposed to these compounds. That’s why a label stating “vinyl-compatible” isn’t always enough: the adhesive must suit the specific backing and intended use.
I think of glue as one part of a flooring system, not a stand-alone fix. Even a premium adhesive can fail over a damp slab, dusty plywood, or an uneven patching compound.
Match the Glue to the Type of Vinyl Flooring
Before shopping, find the product name and installation instructions on the flooring carton or manufacturer’s website. Terms such as “dry-back,” “glue-down,” and “full-spread” matter more than the decorative finish.
Glue-Down Luxury Vinyl Plank and Tile
Dry-back luxury vinyl plank (LVP) and luxury vinyl tile (LVT) are made to bond directly to a suitable subfloor. Many use acrylic pressure-sensitive adhesive, but others call for wet-set, transitional, or firm-set products.
The format affects the choice too. Long planks and large-format tiles can be more sensitive to movement or edge lift than smaller pieces. I look for an adhesive explicitly approved for the plank dimensions, backing, expected traffic, and installation conditions.
Do not assume the adhesive intended for one brand of LVP is automatically approved for another.
Vinyl Composition Tile (VCT)
VCT is common in schools, utility spaces, and commercial buildings. It is not the same material as modern luxury vinyl tile, even though both come in squares.
VCT typically uses a thin-spread, pressure-sensitive tile adhesive applied according to the product’s instructions. Many formulas are designed to dry to the touch before the tiles go down. Use one that specifically names VCT on its approved-flooring list.
Sheet Vinyl: Backing Makes the Difference
Sheet vinyl is where generic advice becomes especially risky. Felt-backed, fiberglass-reinforced, and solid vinyl sheets can have different adhesive requirements.
Some products need full-spread wet-set adhesive. Others permit pressure-sensitive glue, perimeter attachment, tape, or loose-lay installation under defined conditions. For example, Shaw’s DuraTru installation guidance describes both loose-lay and full-spread options for particular fiberglass-backed sheets.
I always check the exact backing before opening a bucket. A glue that works under solid vinyl sheet may not be approved for a cushioned or felt-backed product.
Floating and Peel-and-Stick Vinyl
Most click-lock floating vinyl flooring should not be glued to the subfloor. Its locking system is designed to move as a floating assembly, and adding adhesive may interfere with that design or the warranty.
Peel-and-stick tiles already have adhesive on their backs. Extra glue is not automatically helpful; use primer or additional adhesive only when the tile manufacturer specifies it. Don’t confuse a peeling repair with permission to glue an entire floor.
| Flooring type | Adhesive approach to investigate | Main compatibility check |
|---|---|---|
| Dry-back LVP or LVT | Approved pressure-sensitive, transitional, or firm-set adhesive | Plank size, backing, traffic, and heat |
| VCT | VCT-rated thin-spread adhesive | Tile manufacturer and subfloor approval |
| Solid vinyl sheet | Specified wet-set or pressure-sensitive adhesive | Sheet construction and installation method |
| Felt- or fiberglass-backed sheet | Backing-specific adhesive or approved loose-lay system | Exact backing and full-spread requirements |
| Click-lock or peel-and-stick vinyl | Usually no additional flooring glue | Installation instructions and warranty |
Understanding the Main Types of Vinyl Flooring Glue
Adhesive names describe how a product behaves during installation, not simply how strong it sounds on the label.
Pressure-Sensitive Acrylic Adhesive
Pressure-sensitive adhesive develops tack as moisture evaporates. Depending on the formula and application method, flooring may be laid once it reaches a particular tack or dry-to-touch condition. Rolling then helps establish intimate contact.
It’s popular for compatible LVP, LVT, and VCT because it can offer a useful working window. Some formulas remain releasable; others form more permanent bonds. Those properties are not interchangeable, so I read the technical data sheet rather than relying on the phrase “pressure-sensitive.”
Wet-Set Adhesive
With a wet-set application, the flooring is placed into adhesive while it is still wet or at the prescribed partially dried stage. This allows adhesive transfer to the floor’s backing.
Wet-set products are used for specified sheet vinyl and some solid vinyl flooring systems. They may need an absorbent substrate or particular drying conditions. Trapping moisture between a nonporous vinyl backing and a nonporous surface can cause problems unless the adhesive system specifically allows that installation.
Transitional or Firm-Set Adhesive
Transitional adhesives begin with pressure-sensitive-style installation characteristics but develop a firmer bond as they cure. They can be useful where dimensional control and resistance to rolling loads matter.
For example, ROBERTS describes its 6399 adhesive as a transitional option for LVT, LVP, and VCT. That’s an example of a product category, not an endorsement for every vinyl floor.
Hard-Set, Epoxy, and Polyurethane Systems
A firmer, specialized bond may be necessary in entrances, areas with intense sunlight, or locations exposed to demanding rolling loads. Some manufacturers specify high-temperature hard-set glue, two-part epoxy, or polyurethane-based adhesive for these conditions.
These are not automatically better choices for a bedroom. They may involve tighter mixing, application, or cleanup requirements. I reserve them for situations where the flooring maker calls for their performance.
Check the Subfloor Before Choosing Adhesive
Subfloor condition can change which adhesive is suitable, even when the vinyl flooring stays the same. Here’s the practical distinction I use: the top layer must be bondable, and the structure beneath it must be stable.
| Subfloor | What I check before selecting glue | Typical preparation |
|---|---|---|
| Concrete | Moisture, alkalinity, porosity, surface contaminants | Test as specified; clean, patch, or level |
| Plywood underlayment | Grade, fastening, movement, seams, surface condition | Secure approved panels and smooth joints |
| Existing ceramic tile | Soundness, glaze, grout lines, manufacturer approval | Clean, abrade or prime if directed, and level |
| Existing resilient flooring | Layer count, bond, texture, possible incompatible residues | Confirm overlay approval and required treatment |
| Gypsum-based underlayment | Strength, dryness, primer compatibility | Use specified primer and preparation system |
Concrete: Moisture Resistance Is Not Moisture Control
A concrete slab can look dry while still releasing enough moisture to damage an adhesive bond. For projects requiring concrete testing, manufacturers may specify in-situ relative humidity testing under ASTM F2170, calcium chloride testing under ASTM F1869, and a surface-pH assessment.
There is no single safe moisture number for all glues. For instance, Armstrong S-515 lists a relative humidity limit of 95%, while other products have lower limits. Those numbers apply only with the stated substrate, flooring, and installation conditions.
I don’t treat a “high-moisture” label as permission to skip testing or use glue as a substitute for a required moisture mitigation system.
Wood and Existing Flooring Need Separate Approval
Plywood must be an approved underlayment, firmly secured, smooth, and free from wax or dust. Ordinary subfloor panels and soft, unstable boards are not automatically acceptable bonding surfaces.
Installing over old flooring is possible in some systems, but embossed patterns, loose tiles, and leftover adhesive can compromise the result. Old adhesive residue requires particular care: some manufacturers allow a thin, smooth film under specified products, while others prohibit it. Avoid solvent removers unless the system approves them.
If an older floor or black adhesive could contain asbestos, don’t sand, grind, or scrape it until a qualified professional has assessed it.
How I Choose the Best Glue for a Particular Room
Rather than looking for one “best glue for vinyl flooring,” I narrow the decision with five checks.
1. Read the Flooring Manufacturer’s Adhesive List
Start with the exact model, not just the brand. Find approved adhesive names or performance categories and check whether the instructions distinguish residential from commercial installations. If two documents disagree, ask the flooring manufacturer for written clarification before proceeding.
2. Match the Adhesive to the Subfloor
Confirm that the product approves the substrate and its porosity. An adhesive intended to dry by releasing water into absorbent concrete may behave differently over glazed tile or a sealed floor.
3. Account for Sunlight, Heat, and Heavy Loads
A kitchen with a sunny sliding door places different demands on glue than an interior bedroom. Radiant heating, glass-fronted rooms, wheelchairs, rolling carts, and commercial cleaning equipment also matter.
Karndean’s adhesive range illustrates why manufacturers offer distinct high-temperature and moisture-tolerant systems. I would choose based on the actual conditions, not the strongest marketing claim.
4. Check the Installation Window
Open time is the waiting period before flooring placement; working time is the window in which the adhesive can still form its intended bond. These change with humidity, temperature, substrate porosity, and application thickness.
A product that seems easy to work with in a dry room may take longer to reach the right tack in humid weather. Armstrong’s adhesive FAQs explain why laying too early or too late can lead to failures.
5. Read the Fine Print on Emissions and Cleanup
For occupied homes, I favor products with documented low emissions and suitable indoor-use approvals. Water-based acrylic formulas often clean up more conveniently while wet, but “low odor” doesn’t eliminate the need for ventilation.
Check the safety data sheet, shelf life, storage requirements, and whether the adhesive can withstand the room’s expected service conditions.
Applying Vinyl Flooring Adhesive Without Creating Problems
Once the product pairing is confirmed, application becomes a matter of following the specified system closely.
First, prepare the room and flooring to the manufacturer’s temperature and conditioning requirements. Repair low spots and ridges before spreading glue. Thin vinyl can reveal subfloor imperfections that thicker materials might disguise.
Next, use the exact notched trowel or roller specified on the adhesive label. A larger notch isn’t an upgrade: it may leave too much glue, delay drying, or cause ridges to show through. Work in manageable sections so you can place the flooring before the working time expires.
Then follow the stated wet-set, semi-wet, tacky, or dry-to-touch instructions. The terms aren’t interchangeable. A quick fingertip test may be part of the manufacturer’s method, but the printed installation instructions should control.
Finally, roll the flooring with the weight and technique specified for that product, often using a heavy floor roller for full-spread installations. Rolling presses the backing into the adhesive and helps prevent hollow spots. Observe the required waiting period before heavy traffic, furniture, washing, or heat-welding seams. Some specialty systems allow rapid access; others need much longer.
Common Glue-Down Problems and What They Usually Mean
Edges Lift or Plank Ends Curl
Possible causes include unsuitable adhesive, missed rolling, temperature movement, or poor contact at the edges. Before adding glue, identify the reason for the failure. Spot-repair adhesives may not be compatible with the original system.
Bubbles Appear Under Sheet Vinyl
Bubbles can result from trapped air, moisture, poor subfloor preparation, or laying sheet flooring into adhesive at the wrong stage. Puncturing a bubble without diagnosing the cause can create a visible defect and may not restore the bond.
Glue Oozes Between Tiles
Too much adhesive or premature placement can force glue up through the joints. Correct trowel size and timing matter more than applying extra pressure afterward. Clean fresh residue only with the method approved for the flooring surface.
Seams Open Months Later
Open seams may reflect dimensional changes, subfloor movement, thermal exposure, or insufficient adhesive shear strength. I would investigate the room’s temperature patterns and the original adhesive specification before assuming the planks themselves are defective.
A Compatibility Detail Many Buyers Miss
Two adhesives can both claim LVP compatibility and still be unsuitable substitutes. One may approve only small tiles, another may require an absorbent substrate, and a third may be designed for heavy rolling loads but not intense solar heat.
My most useful shopping habit is to compare four documents together: the flooring installation guide, the adhesive technical data sheet, the subfloor preparation requirements, and the product warranty. If all four describe the same installation, the choice is much safer than buying by price or online ratings alone.
Frequently Asked Questions
What is the best glue for vinyl plank flooring?
The best option is an adhesive specifically approved for your dry-back vinyl plank model, subfloor, and expected traffic; many use pressure-sensitive or firm-set formulas.
Can I use regular construction adhesive for vinyl flooring?
Usually not. General construction adhesive may cause uneven bonding or damage the vinyl; use a flooring-specific product approved by the manufacturer.
Can vinyl flooring be glued directly to concrete?
Yes, when the vinyl and adhesive permit concrete installation and the slab meets the required moisture, pH, flatness, and preparation standards.
How long does vinyl floor glue take to dry?
It varies by adhesive and conditions. Open time, working time, cure time, and the period before heavy traffic are different; follow the product’s instructions.
Do I need glue for peel-and-stick vinyl tiles?
Normally no. Their adhesive is preapplied; add primer or supplementary adhesive only if the tile manufacturer’s instructions specifically require it.
Final Thoughts
The right glue for vinyl flooring isn’t the most expensive bucket or the one promising the strongest hold. It’s the adhesive that matches the flooring type, backing, subfloor, and conditions in the room.
Before buying, find your flooring’s installation sheet and check it against the adhesive technical data sheet. That small bit of research can prevent a surprisingly expensive floor replacement later.