

A peel and stick tiles floor is a type of flooring made from self-adhesive tiles, usually vinyl, that attach directly to a prepared surface without separate flooring glue. Each tile has a protective backing that you remove before pressing it into place. It offers a relatively affordable way to refresh an outdated floor, often without removing the existing covering. The catch is that the surface underneath must be clean, dry, flat, and compatible with the product.
I see peel and stick floor tiles as a smart option for the right room, not an automatic replacement for ceramic tile or luxury vinyl plank. They can look remarkably polished, but moisture, uneven subfloors, and rushed installation can shorten their useful life. Here’s how I would decide whether they’re worth buying and how to get a finish that lasts.
How Does Peel and Stick Flooring Work?
The adhesive is already applied to the underside of each tile. Once you peel away the release paper, pressure helps bond the tile to the subfloor. That makes installation simpler than mortar-set ceramic tile and many glue-down flooring systems.
Most self-adhesive floor tiles are vinyl, although constructions and finishes differ. Some mimic marble, terrazzo, encaustic tile, concrete, or wood. Square tiles are common, while peel and stick vinyl planks give you a longer, wood-floor appearance.
The word “stick” can be misleading. These aren’t reusable stickers. A secure bond may damage paint, leave residue, or pull up weak finishes during removal. And because tiles meet at individual seams, even a water-resistant vinyl surface doesn’t automatically create a waterproof floor assembly.
Why Homeowners Choose Peel and Stick Floor Tiles
The Advantages
For me, the biggest appeal is control. You can change a tired-looking kitchen or laundry room without purchasing specialized cutting equipment or scheduling a major renovation.
The tiles are relatively easy to carry, trim, and replace individually. Many designs also disguise worn-looking surfaces with convincing stone or patterned finishes. Low overall thickness may help at some doorways, although clearances still need checking.
The Limitations
Peel and stick flooring depends heavily on the condition of the base beneath it. A raised grout line, nail head, or dip may eventually show through thin vinyl. Weak adhesion can cause curling corners or shifting seams.
It is also less forgiving of standing water and temperature swings than some alternative floors. Heavy furniture, grit, and rolling chairs can wear the surface or stress the edges. Cheap tiles may save money today while creating more repairs later.
Which Rooms Are Best for Peel and Stick Tiles?
I evaluate rooms by three things: moisture exposure, foot traffic, and subfloor condition. A good-looking tile isn’t necessarily a good fit for every location.
| Room or location | My assessment | What to check first |
|---|---|---|
| Bedroom or home office | Often a good candidate | Chair wheels, furniture protection, smooth base |
| Kitchen | Suitable with precautions | Spills, appliance movement, seams near the sink |
| Laundry room | Conditional | Washer leaks, vibration, moisture near connections |
| Powder room | Often possible | Splash control and product water-resistance rating |
| Full bathroom | Higher risk | Standing water, tub edges, manufacturer approval |
| Basement | Depends on moisture testing | Concrete moisture and vapor conditions |
| Garage or outdoor porch | Generally avoid | Temperature extremes and product restrictions |
A powder room is different from a bathroom where water regularly escapes the shower. In wet areas, I’d rather choose flooring specifically approved for those conditions than trust the word “waterproof” on a tile’s face.
Products also differ. For example, FloorPops’ installation guidance excludes radiant-heated floors and certain temperature conditions. Always follow the instructions for the exact product you’re buying.
How to Choose the Right Self-Adhesive Floor Tiles
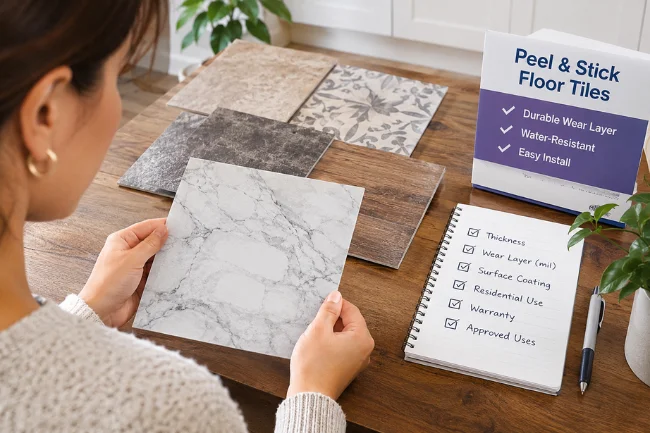
Check the Wear Surface, Not Just the Pattern
Attractive photography can hide a very thin protective surface. Look for information about overall tile thickness, wear layer, surface coating, and intended residential use. A wear layer labeled in “mil” means thousandths of an inch, not millimeters.
Not every manufacturer reports wear layers the same way, so don’t assume two products are equally durable because their numbers look similar. I would compare warranties and approved uses alongside thickness.
Decide Between Tiles and Planks
Square tiles suit checkerboard, marble, and decorative geometric designs. Long planks better imitate timber and can visually stretch a narrow room. Large patterns look dramatic, but their alignment becomes more noticeable around awkward walls.
Before ordering, place samples beside your cabinets and view them in morning and evening light. A cool gray marble effect can turn bluish beside warm wood, while busy patterns may fight with already-patterned countertops.
Check the Subfloor Compatibility
Some brands allow installation over properly prepared plywood or specific existing resilient floors. Others reject linoleum, floating laminate, heavily textured tile, or certain coatings. Concrete may require a compatible primer and moisture testing.
Never assume “works over existing flooring” means “works over anything.” The product’s installation sheet should settle that question before you spend money.
How Much Does a Peel and Stick Tiles Floor Cost?
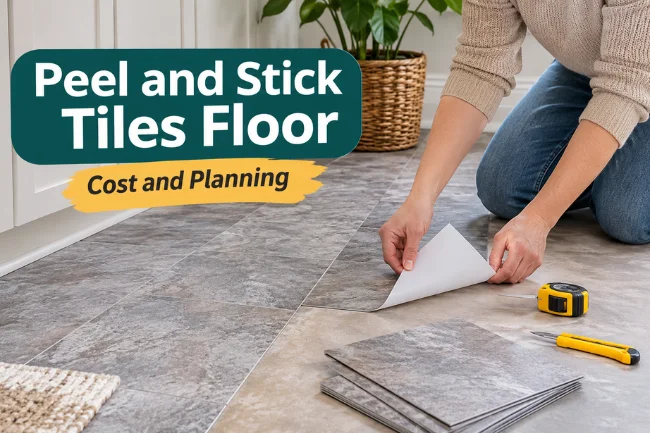
Peel and stick vinyl is commonly sold by the tile, pack, or square foot. Retail prices vary by design, construction, brand, and region. As a rough shopping reference, US retail listings include options around $1.50–$3 per square foot, with premium selections costing more. Treat that range as an example, not a quote.
Here’s a planning calculation I find more useful than comparing pack prices alone. Suppose your room measures 10 by 12 feet:
- Floor area: 120 square feet.
- With 10% extra for cuts and mistakes: 132 square feet.
- At an illustrative $2 per square foot: $264 for tiles.
That doesn’t include primer, floor patch, trim, tools, delivery, or subfloor repairs. For a complicated pattern or irregular room, I would allow extra waste. Check how many square feet each unopened carton covers and round up to whole cartons.
A low tile price isn’t a bargain if the floor needs extensive leveling. I always treat surface preparation as part of the true project cost.
Preparing the Floor Before Installation
Make Sure the Base Is Flat, Sound, and Dry
Remove loose debris, grease, old wax, and anything that could interfere with adhesion. Repair cracks and depressions with a flooring-compatible product. Countersunk fasteners should sit below the surface; loose boards must be secured before covering them.
Don’t rely on the new vinyl to disguise defects. Thin tiles can telegraph bumps and deep grout lines. Some ceramic tile substrates may be acceptable after grout lines are filled and the surface is made smooth, but only if the manufacturer approves that assembly.
Concrete deserves special attention. An apparently dry slab can still have moisture problems. Use the moisture-testing method and limits required by the flooring manufacturer rather than guessing by touch.
Let the Tiles Acclimate
Many manufacturers specify roughly 48 hours in the installation room, but time and temperature requirements vary. Keep packages flat and the indoor climate within the product’s stated range.
I wouldn’t install tiles straight from a cold garage or hot delivery vehicle. Temperature differences can affect how well the material settles and bonds.
Map the Room’s Trouble Spots
Here’s a small planning trick I recommend: mark the door swing, the route people usually walk, sunny window areas, appliance edges, and any place where water collects. This “wear map” tells you where seams, furniture protection, and careful preparation matter most.
Also check that added flooring height won’t trap a door, interfere with an appliance, or create an awkward transition into the next room.
How to Install Peel and Stick Floor Tiles
1. Plan the Layout Before Removing Any Backing
Measure the room and mark intersecting reference lines. Dry-lay several rows with the protective backing still attached. Adjust the layout to avoid thin slivers at the walls and to keep a prominent pattern centered where it will be seen.
For wood-look planks, follow the manufacturer’s offset pattern rather than assuming any stagger will work. Mix pieces from different cartons if the instructions allow it, particularly with printed wood grain.
2. Prepare and Prime as Directed
Vacuum carefully, then make sure the surface is fully dry. Apply a product-approved primer where required, especially on porous substrates. Let it dry for the specified period.
Don’t add construction adhesive as an improvised fix. Some self-stick brands expressly prohibit extra glue, and the wrong product may interfere with the bond or warranty.
3. Set the First Tile Accurately
Peel the backing from one tile, avoid touching the adhesive, align it with your reference lines, and press firmly. Place the next tile close to the first without forcing or overlapping the edges.
Work outward in manageable sections. A slightly crooked first row can turn into a visibly uneven pattern across the entire room, so I would check alignment every few rows instead of waiting until the opposite wall.
4. Cut Neatly Around Edges and Fixtures
Use a sharp utility knife and straightedge according to the product instructions. Measure twice around door frames, pipes, and corners; make paper templates for difficult shapes if needed.
Leave perimeter clearance when specified by the manufacturer and cover it with approved trim. Don’t jam tiles tightly into every wall, because some products need space to accommodate movement.
5. Roll the Finished Floor
Pressing by hand alone may not provide enough consistent pressure. Many manufacturers recommend a heavy floor roller; some specify a 75–100-pound roller. Follow your specific instructions, including the direction and timing of rolling.
Wait the required period before wet cleaning, replacing heavy furniture, or exposing the surface to significant traffic. For example, FloorPops advises waiting five days before cleaning its tiles.
Common Mistakes That Make Tiles Lift or Look Cheap
The most frequent failure isn’t a poor-looking pattern; it’s treating preparation as optional. Dust, wax, moisture, and rough surfaces are enemies of pressure-sensitive adhesive.
Another mistake is laying tiles directly over deep grout joints. The lines may become visible through the vinyl, and unsupported edges can suffer. A tile applied over a moving floating floor can also loosen as the layers shift.
I would avoid placing the tiniest cut pieces in the most visible doorway, buying different production lots without checking color, or stretching tiles to force a pattern match.
Finally, don’t assume a bathroom floor is protected against leaks just because the tile itself resists water. Seams, perimeter gaps, and subfloor moisture remain separate concerns.
How Long Do Peel and Stick Floor Tiles Last?
There’s no honest single lifespan for every brand and household. Longevity depends on the wear surface, adhesion, temperature stability, cleaning habits, moisture, and daily traffic.
A lightly used guest room with a stable subfloor will generally be kinder to self-stick vinyl than a busy entrance with wet shoes and tracked-in sand. If you see curling edges, spreading seams, or dark moisture marks, investigate the cause instead of repeatedly pressing the problem tile down.
I suggest keeping a few spare tiles from the same batch. Replacing one damaged piece is easier when the color and pattern still match, though removing it can damage the underlying finish.
Cleaning and Maintaining a Peel and Stick Floor
Sweep or vacuum with a hard-floor-safe setting to remove grit before it scratches the surface. For routine cleaning, use a manufacturer-approved vinyl floor cleaner and a lightly damp mop. Wipe spills promptly and dry wet areas.
Avoid flooding the floor, steam mops unless specifically permitted, abrasive scrubbers, and harsh chemicals. Some brands prohibit wax, bleach, or common multi-purpose detergents.
Felt pads beneath furniture can reduce scuffs. Use a protective mat approved for vinyl beneath rolling desk chairs, and lift heavy furniture instead of dragging it. Direct, prolonged sunlight may also contribute to fading or temperature-related movement, so window coverings can help.
Can You Remove Peel and Stick Flooring in a Rental?
Yes, many products can be removed, but that doesn’t make them damage-free or renter-friendly. Strong adhesive may pull up paint, leave a sticky film, or damage an older finish. FloorPops specifically warns that its floor tiles are not removable like temporary wall decals.
If you’re renting, get permission before installation and check what the lease requires at move-out. I would test one tile in an inconspicuous area only after the property owner approves it; even the test itself could cause damage.
Older floors need a separate safety check. Some historical flooring and adhesives contain asbestos, which can’t be identified reliably by sight. The US Environmental Protection Agency advises against sanding or disturbing suspected asbestos flooring and recommends qualified help when renovation could disturb it.
Peel and Stick Tiles vs. Other Flooring Options
| Flooring type | Main advantage | Main trade-off | Often best suited to |
|---|---|---|---|
| Peel and stick vinyl tile | Simple DIY installation and lower upfront cost | Subfloor and adhesive sensitivity | Budget updates in suitable dry or occasionally damp rooms |
| Click-lock luxury vinyl | More substantial floating floor options | More cutting, trim, and clearance considerations | Larger, longer-term updates |
| Sheet vinyl | Fewer seams across a small room | Awkward handling and fitting | Rooms where minimizing seams matters |
| Ceramic or porcelain tile | Hard, durable surface when properly installed | Higher labor and substrate demands | Long-term, properly waterproofed wet-area projects |
I would pick peel and stick tiles when the surface is already suitable, the budget is limited, and a manageable DIY update matters most. For a chronically damp basement or a shower-adjacent space, I’d prioritize the moisture system over the quickest installation method.
Frequently Asked Questions
Can peel and stick tiles go over existing tile?
Sometimes. The original tile must be secure, and grout joints usually need filling to create a smooth base. Check the new flooring manufacturer’s instructions.
Are peel and stick floor tiles waterproof?
Some products have waterproof or water-resistant vinyl surfaces, but the installed seams and subfloor may still allow moisture damage. Check the complete flooring system.
Do I need extra glue for peel and stick floor tiles?
Usually not. Many already have pressure-sensitive adhesive, and some manufacturers prohibit added glue. Use an approved primer only where directed.
Can peel and stick tiles be used in a bathroom?
They can work in certain bathrooms if the product is approved and water is controlled. Frequent standing water makes them a riskier choice.
Why are my peel and stick floor tiles lifting?
Common causes include dust, moisture, uneven surfaces, temperature problems, and insufficient rolling pressure. Identify the cause before attempting a repair.
Final Thoughts
A peel and stick tiles floor can make an outdated space feel fresh without the expense and disruption of a full flooring replacement. Its real strength is convenience, but its long-term success comes from choosing the correct product and preparing the base carefully.
Before buying, measure your room, inspect the subfloor, order a few samples, and read the installation sheet. Those decisions will matter more than how attractive the pattern looks in a product photo.