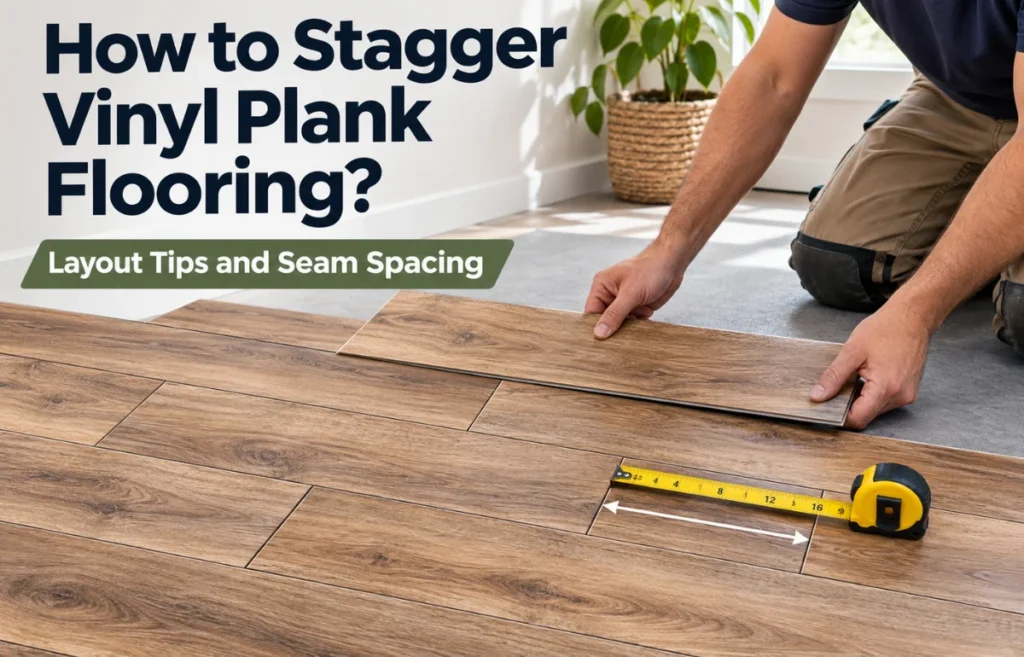
To understand how to stagger vinyl plank flooring, focus on where the short ends of the planks meet. Staggering means shifting those end joints from one row to the next instead of lining them up. I recommend planning several different starter-plank lengths, checking the distance between neighboring seams, and reusing suitable offcuts without forcing a repeating pattern. The required offset varies by product: some installation instructions call for at least 6 inches, others 8 or 12 inches. Always follow the directions for your specific flooring. A well-planned stagger gives the floor a more natural wood-look appearance and helps keep click-lock joints arranged as the manufacturer intended.
The challenge is keeping seams far enough apart without leaving a tiny piece at the wall. Here’s how I plan it.
What Does Staggering Vinyl Plank Flooring Actually Mean?
Every vinyl plank has long edges running along its sides and short edges at its ends. When two planks meet end to end, they create an end joint, also called a butt joint or short-end seam.
Staggering moves those short-end seams sideways across successive rows. Think of a brick wall with unevenly positioned vertical joints, except vinyl plank flooring usually looks better when the offsets don’t repeat with perfect regularity.
For click-lock flooring, those joints are part of the locking system. Glue-down and loose-lay products may have different layout rules.
Staggering measures distance along the plank’s length, not between neighboring long edges.
How Far Apart Should Vinyl Plank End Joints Be?
There isn’t one universal minimum stagger. The number printed in your flooring’s installation manual takes priority over any general rule online.
For example, Shaw’s loose-lay vinyl plank instructions specify at least 6 inches between end seams in neighboring rows. COREtec’s SPC installation guide calls for at least 8 inches. Pergo’s Rigid Click guide specifies at least 12 inches. Those examples show why a blanket instruction to “always stagger 6 inches” can be wrong.
| Manufacturer guide and product type | Specified adjacent-row end-joint offset | Practical takeaway |
|---|---|---|
| Shaw loose-lay vinyl plank | At least 6 inches | Avoid straight, uniform seam lines |
| COREtec Pro SPC | At least 8 inches | Check both the starter piece and seam separation |
| Pergo Rigid Click | At least 12 inches | Plan longer offsets before cutting starters |
These are examples from particular installation guides, not universal brand-wide rules. Check the instructions supplied with your exact collection, plank length, and locking profile.
I also separate two measurements that are easy to confuse: the minimum length of a starter or finishing piece, and the minimum distance between adjacent end joints. A piece can be long enough to install but still place its seam too close to the seam in the row beside it.
Choose a Stagger Pattern Before You Cut
Random-Looking Stagger: My Preferred Option
A controlled random layout varies starter lengths without creating dangerously close joints or an obvious repeating rhythm. It usually suits realistic wood-look vinyl because natural boards rarely form a perfectly synchronized pattern.
“Random” doesn’t mean grabbing scraps blindly. I select each starter after checking the previous row’s joint locations. I also look two or three rows back to make sure a distracting visual pattern isn’t developing.
One-Third Offset: Easy to Plan, More Repetitive
With 48-inch planks, a one-third progression uses starters around 48, 32, and 16 inches before repeating, provided all length and spacing rules are met.
The downside is that a repeat every third row becomes noticeable across a wide floor. Some product instructions specifically prefer a random appearance, so I treat this as a planning example, not a default recommendation.
Half-Plank Offset: Neat but Not Always Suitable
A half-plank pattern alternates full-length and half-length starters. It produces straight, regularly spaced joint lines similar to traditional brickwork.
It can look formal on wood-look planks and may conflict with product instructions.
A Five-Row Stagger Example Using 48-Inch Planks
Numbers make seam spacing much easier to visualize. Imagine uniform 48-inch planks laid lengthwise in a room where each row is long enough to contain multiple boards. The measurements below describe the length of the first plank in each row, starting from the same wall.
| Row | Starter-plank length | Nearest end-joint offset from previous row |
|---|---|---|
| 1 | 48 inches | Starting row |
| 2 | 17 inches | 17 inches |
| 3 | 35 inches | 18 inches |
| 4 | 12 inches | 23 inches |
| 5 | 29 inches | 17 inches |
All adjacent-row offsets in this illustration exceed 12 inches, although the actual room length still needs checking for acceptable pieces at the far wall. Treat these as possible starter lengths, not an instruction to cut five new planks regardless of available offcuts.
Here’s the subtle part. In row one, the first end joint sits 48 inches from the starting wall. In row two, joints appear at 17, 65, and 113 inches. The nearest joint to the 48-inch seam is actually at 65 inches, just 17 inches away.
That is why comparing only the first two starter lengths can fool you. Every full-length plank repeats the joint position 48 inches farther along. Check the closest seams, not simply the difference between starter measurements.
How to Plan the First Three Rows
Measure the Room and Establish the Starting Line
Measure the length of the room at more than one point. Walls are not always parallel, and a layout that works near one corner can leave a narrow end piece elsewhere. Subtract the required perimeter expansion gaps when calculating usable row length for a floating floor.
Then measure the room’s width across the plank rows. Divide that width by the exposed plank width to see whether the last row would become an awkward sliver. If it would, trim the first row’s width to balance the first and last rows. That is a separate calculation from end-joint staggering, but both affect the finished appearance.
I check that the starting line remains straight through nearby doorways.
Dry-Lay the First Row
Place the first row without permanently committing to the cuts. Check the piece that would finish against the opposite wall. If it’s shorter than the product’s permitted minimum, shorten the first plank and recalculate.
For click-lock products, keep factory locking profiles where the adjoining planks need to connect. A cut edge normally faces the wall, not another plank’s locking joint. The precise assembly direction depends on the locking system.
Pick the Second-Row Starter by Its Seam Position
Once row one is mapped, consider the offcut from its final plank. Reuse it if its length, locking orientation, and resulting end-joint offset all comply with the instructions.
Suppose that offcut is only 5 inches long, while your flooring requires at least an 8-inch starter. Don’t use it just to save material. Choose another suitable offcut or cut a fresh starter.
Check the Third Row Before Locking the Second
I lay out three row beginnings together to spot H shapes or staircases early.
Confirm the seams satisfy the required distance between each pair of adjacent rows. Then inspect the larger view: are different wood-grain prints spread around, or are identical boards appearing next to each other? Mixing planks from several cartons usually helps.
Calculate the End-Joint Offset Without Guessing
You don’t need advanced math, but one small calculation prevents a surprising number of mistakes.
For equal-length planks, let L be the full plank length. Let A and B be the lengths of starters in adjacent rows. Find the absolute difference between A and B. Then subtract that difference from L. The smaller of those two results is the nearest repeating end-joint offset.
In plain language: nearest offset = smaller of (starter-length difference) and (full plank length minus that difference).
For 48-inch planks, consider starters of 10 and 40 inches. Their difference is 30 inches, which sounds generous. But the nearest seams are only 48 minus 30, or 18 inches apart. If the requirement is 12 inches, this pair passes; if it were 20 inches, it would fail.
This shortcut works for rows made from uniform-length planks and normal repeating end joints. Mixed-length products need a direct seam-by-seam check. I mark seam positions on a simple sketch when the room has alcoves or unusual cuts.
Reuse Offcuts Without Letting Scraps Control the Pattern
The small piece left after cutting the end of one row can often start another row. That’s an efficient way to reduce waste, and many click-lock instructions explicitly allow it.
However, a scrap isn’t automatically usable. First, check its length against the minimum permitted starter size. Second, confirm that the uncut locking end faces the correct direction. Third, calculate where its first joint will sit compared with the previous row.
If it fails any of those checks, save it for a later row where it works or use it for a suitable perimeter cut. Forcing one bad scrap into the layout can create a seam problem that repeats across the floor.
I find it useful to make three small piles: ready-to-use starters, pieces that might work later, and offcuts too short for normal row starts. That keeps usable pieces handy.
Avoid H-Joints, Staircases, and Tiny End Pieces
H-Joints and the Repeating Two-Row Look
An H-joint appears when the end seams in every other row line up, creating a repeated H-shaped arrangement. A half-plank layout can produce this deliberately, but it often looks mechanical on natural wood designs.
It isn’t accurate to say every H-pattern is structurally prohibited. The real test is what your flooring manufacturer permits. If the guide calls for a random layout, I avoid repeating those alternating seams.
Stair-Step Seams That Travel Diagonally
A staircase develops when each row’s starter gets shorter by the same amount: 48, 36, 24, 12 inches, for example. The end joints march diagonally across the room.
Even when the gaps are technically large enough, this pattern may look too predictable. Some manufacturers also advise against it. Varying starter lengths breaks up that diagonal line without making the installation chaotic.
Tiny Planks Beside the Wall
A row can have a perfect stagger and still finish with a narrow 3-inch piece. Depending on the product, that last piece may violate the minimum-length instruction or be difficult to fit securely.
I calculate the expected final piece before making the starter cut. If the end piece is too short, adjust the starter length and check the adjacent-row offset again. The goal is to satisfy both conditions at the same time.
Handle Hallways, Doorways, and Irregular Rooms
Narrow hallways make patterns look more obvious because there are fewer boards across the width. I usually favor varied starter lengths, but I keep the seam layout simple enough to inspect as the floor moves along the corridor.
Doorways create another trap. You may reach a threshold and discover that a short filler would be needed right where two rooms connect. Check the manufacturer’s transition and expansion requirements before deciding to run the flooring continuously through the opening.
For an L-shaped room, sketch the long run and short return on the same plan. Continue tracking end-joint locations across the area rather than treating the inside corner as a fresh opportunity to line up seams. Where a permitted transition separates independent flooring fields, plan each field according to its own start and finish constraints.
Around pipes and door jambs, use a cardboard template for awkward cuts, but preserve the required clearance and locking profiles.
Mistakes That Can Ruin an Otherwise Good Stagger
The first is following a popular 6-inch rule without reading the box instructions. A product that requires 8 or 12 inches needs more room between adjacent end seams, no matter how convincing an online diagram looks.
The second is assuming staggered seams can compensate for an uneven subfloor. They can’t. An unacceptably uneven base can stress locking joints even when the plank pattern is ideal. Check flatness, moisture, and approved underlayment requirements separately.
The third is forgetting expansion space. Floating floors need the specified perimeter clearance and must not be pinned by inappropriate fasteners or fixtures.
Another common mistake is mixing up stagger distance with visual randomness. A varied pattern can still have adjacent seams only 2 inches apart. Appearance is a useful second check; measured compliance comes first.
Finally, correct any improperly locked joint before moving on. Good staggering cannot compensate for a damaged connection.
My Final Layout Check Before Installation Continues
After laying out three or four rows, I look across the room rather than straight down at my feet. From that angle, repeated H shapes and diagonal staircases stand out quickly.
I then verify the nearest seam spacing between adjacent rows, make sure the planned far-wall pieces aren’t too short, and confirm there are no repeated wood-grain prints clustered together. If one starter creates a problem, it’s easier to change it now than to undo several locked rows.
A quick pencil sketch with each row’s starter length and visible seam positions is enough for most rectangular rooms. It also makes the project easier to resume after a break, when remembering which scrap belonged to which row becomes surprisingly difficult.
A Better-Looking Floor Starts With the Seam Plan
Learning how to stagger vinyl plank flooring is really about controlling short-end joints, not memorizing a decorative pattern. Follow your product’s minimum offset, test different starter lengths, and check the end pieces before committing to a row.
Before you cut the next plank, sketch your first five rows and measure the closest seam in each neighboring pair. That small bit of planning can save both material and a frustrating do-over.
FAQs About Staggering Vinyl Plank Flooring
How much should I stagger vinyl plank flooring?
Use the minimum listed for your exact product. Common manufacturer examples include 6, 8, and 12 inches between end joints in adjacent rows.
Can I stagger vinyl plank flooring every other row?
You can only use an alternating pattern if your product permits it. For a natural wood appearance, varied offsets usually look less repetitive.
Is a random pattern better than a 50/50 pattern?
A controlled random pattern usually creates a more natural wood-look floor, but the manufacturer’s approved installation layout matters more than appearance.
Can I use leftover vinyl planks to start the next row?
Yes, if the offcut meets minimum length, locking orientation, and adjacent seam-spacing rules. Otherwise, save it for another location.
What happens if vinyl plank seams are too close together?
Too-close seams may violate installation instructions and can compromise the intended joint layout. Correct the row before continuing rather than relying on the floor to settle.