
Laminate flooring basement installations involve laying interlocking, wood-look laminate planks over a below-grade subfloor, usually concrete, to create a finished living space. Laminate has a decorative wear layer over a wood-based core, so it can look like hardwood without the same price or maintenance demands. But a basement is different from an upstairs room: concrete can release moisture vapor, and cool surfaces can collect condensation. Laminate can work in a dry, climate-controlled basement when the chosen product permits below-grade installation and the slab meets its moisture requirements. It is a poor choice where flooding, active seepage, or recurring dampness occurs. I would decide whether the basement is suitable before deciding which plank color looks best.
Is Laminate Flooring a Good Choice for a Basement?
Yes, with conditions. I like laminate for finished basements used as home offices, family rooms, guest spaces, or playrooms because it offers convincing wood visuals, a firm walking surface, and straightforward cleaning.
Its weakness is the fiberboard core. If water reaches vulnerable joints or edges, planks may swell, cup, or lose their tight fit. A water-resistant surface does not make the entire floor immune to moisture rising from below.
The real question is not simply, “Can laminate go in a basement?” It is, “Can this particular basement remain dry enough for this particular laminate?”
Why Basement Moisture Behaves Differently
Moisture Vapor Can Pass Through Concrete
Concrete feels solid, but it is porous. In an older basement, the slab may lack an effective vapor retarder underneath. Ground moisture can move through it and evaporate unnoticed into the room.
Covering that slab changes the drying conditions. Instead of escaping freely, moisture may build up beneath a less-permeable floor system. A concrete surface that looks dry therefore tells me surprisingly little about what will happen after installation.
Humid Air Can Condense Against a Cold Slab
Moisture does not always rise from the ground. In warm weather, humid air entering a cool basement may reach its dew point against the concrete, as building-science guidance explains. That creates condensation even when the foundation has no visible leak.
This explains why a basement may smell musty during summer but seem fine in winter. Opening windows on a sticky day can actually increase the problem rather than solve it.
Occasional Water Is Different From Everyday Humidity
A minor spill on the finished surface, a slow seep at a wall-floor joint, and two inches of stormwater are three different risks. Water-resistant laminate may tolerate limited surface exposure under its warranty, but it cannot protect a room against groundwater or flooding.
I treat stains at the perimeter, white mineral deposits, peeling paint, recurring odors, and previous water-damage repairs as reasons to investigate further. None proves the slab is unsuitable on its own; together they tell a useful moisture history.
Laminate Flooring Basement Moisture Checks Before You Buy
Start With the Source of the Water
For any laminate flooring basement project, I check gutters, downspouts, exterior grading, foundation cracks, plumbing connections, and the wall-floor joint. A dehumidifier cannot repair a leaking pipe or redirect rainwater away from the foundation.
Ask what happened during the wettest season, not just yesterday. If the basement has a sump pump or floor drain, check the flooring manufacturer’s exclusions carefully. Some laminate products explicitly prohibit installation in those rooms.
Measure Room Humidity Over Time
An inexpensive digital hygrometer reveals how damp the basement air becomes. I would record readings near the floor and across the room for at least a week, including rainy or humid days when possible.
The U.S. Environmental Protection Agency recommends indoor relative humidity below 60%, ideally 30%–50%, to discourage mold. That is a useful moisture-control target, but flooring brands may specify their own permitted room-humidity ranges.
A single pleasant afternoon at 45% humidity is not enough evidence. I care more about repeated peaks, how quickly the space dries, and whether a dehumidifier must run constantly to hold acceptable conditions.
Test Moisture Inside the Concrete
Room humidity and slab moisture are not interchangeable measurements. For concrete, a qualified installer can use in-situ relative humidity testing under ASTM F2170. Some products also permit calcium chloride testing under ASTM F1869.
For perspective, Pergo’s published general guidance specifies less than 80% in-slab RH or no more than 5 pounds of moisture emission per 1,000 square feet in 24 hours. A 2026 Mohawk RevWood Contract specification permits less than 95% in-slab RH. These are product-specific limits, not a universal safe threshold.
The familiar trick of taping plastic over concrete can expose an obvious moisture problem, but a dry result does not certify the slab for laminate. I would never substitute that quick check for the test required by the flooring warranty.
Check Several Areas, Not Just the Center
I pay particular attention to exterior walls, past leak locations, plumbing penetrations, and the lowest corner of the basement. A reading from one central spot may miss a localized problem.
This is a useful way to create a small moisture map: mark problem areas on a rough room sketch, note visible conditions, and attach professional test results. It also gives you a record if the floor later needs attention.
| Basement condition | What it suggests | Sensible next move |
|---|---|---|
| Stable humidity, tested slab within product limits | Laminate may be suitable | Confirm below-grade warranty and barrier requirements |
| Dry-looking slab, but no formal moisture test | Suitability is unknown | Test before purchasing flooring |
| Seasonal condensation or persistent musty odor | Humidity or hidden moisture needs attention | Investigate source and control indoor moisture |
| Active seepage, standing water, or recurring flooding | High risk for fiberboard-core laminate | Correct water intrusion and consider another finish |
Choosing the Right Laminate for Below-Grade Rooms
Read the Installation Instructions Before the Marketing Label
“Waterproof” and “water-resistant” can describe protection against surface spills, not a promise that water cannot damage joints, the core, or the underside. I look for written approval for below-grade use, an explicit concrete moisture limit, and a clear description of exclusions.
I also check whether the warranty excludes sump pumps, floor drains, unusually high humidity, or water entering beneath the boards. If a product page says one thing and its installation document is more restrictive, the installation document should guide the project.
Match Durability to the Room’s Actual Use
A bedroom or quiet office does not put the same wear on flooring as an exercise room or a busy play area. A durable wear layer and suitable abrasion rating matter, but they cannot compensate for a wet foundation.
For basement spaces, I would prioritize a well-documented moisture specification and reliable locking joints over an extra-thick plank. Thickness alone is not a measure of waterproofing.
Know What an Attached Pad Does—and Does Not Do
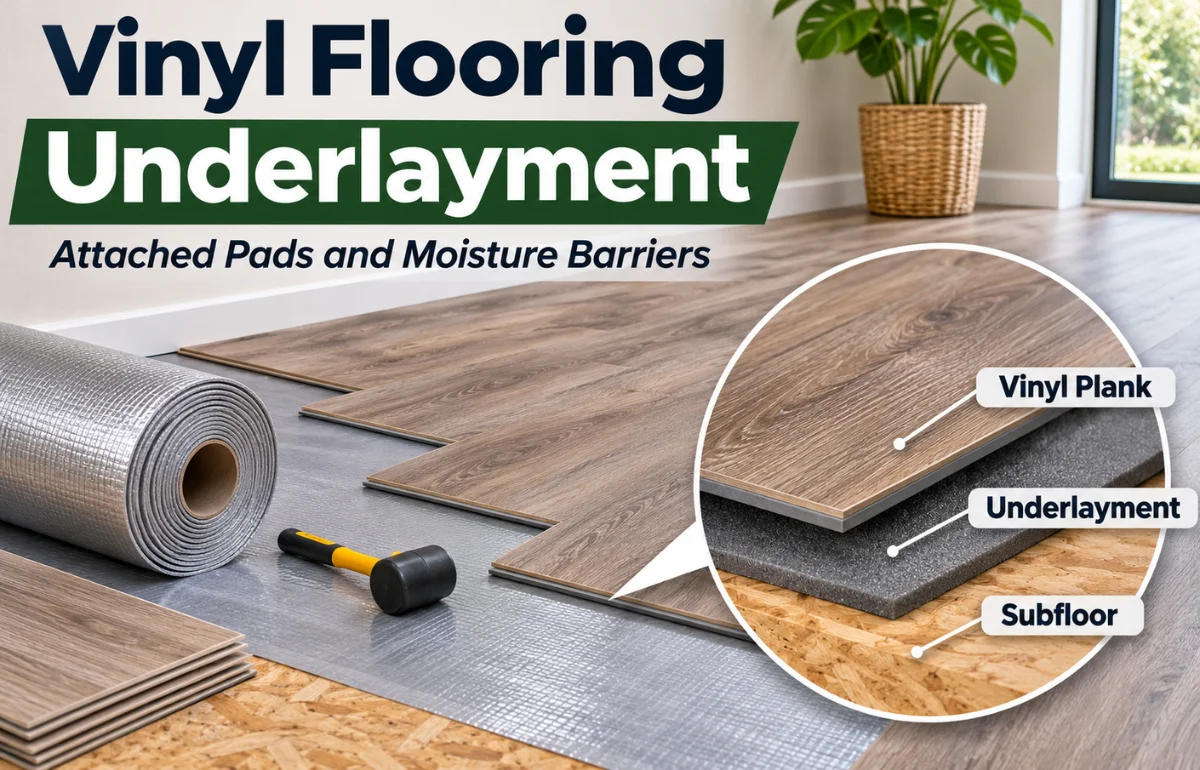
Some laminate comes with acoustic underlayment attached. It can reduce footfall noise and help the floor feel less harsh, but it is not automatically a concrete vapor barrier.
Check whether the manufacturer requires separate polyethylene sheeting or an approved moisture-blocking underlayment. Adding an unapproved second foam pad may make the floor too soft and strain its locking joints.
Preparing a Concrete Basement Subfloor
Make the Slab Dry, Clean, and Structurally Sound
Remove old carpet, damp padding, adhesive residue, and loose materials as permitted by the product instructions. If old flooring or adhesive could contain asbestos, arrange appropriate testing before disturbing it.
Repair the source of leaks before patching cracks. New concrete also needs adequate drying time; being fully cured does not necessarily mean it is dry enough for laminate. Verify the actual moisture reading rather than relying only on the slab’s age.
Correct Flatness, Not Merely Slope
A basement floor may slope toward a drain or a low point. Laminate installation instructions usually focus on flatness—how much the surface rises or dips over a given distance—rather than whether the whole slab is perfectly level.
Use a long straightedge to find high spots and hollows. Grind or patch them with a product compatible with the slab and moisture conditions. For example, Mohawk’s 2026 RevWood Contract instructions limit unevenness to 3/16 inch over 10 feet, with a tighter short-span requirement. Your chosen floor may specify something different.
A lumpy slab can cause hollow sounds, excessive flexing, and damaged click-lock edges even when moisture is under control.
Install the Specified Vapor Retarder
Many laminate systems call for at least 6-mil polyethylene over concrete, with overlapping, taped seams. Pergo’s general instructions specify an 8-inch overlap, while exact details vary among brands and products.
The plastic layer is meant to limit vapor transfer into the laminate assembly. It is not a waterproofing solution for liquid water flowing through cracks or around the foundation. Nor should a random paint-on sealer be assumed to replace an approved barrier.
Where the basement uses an insulated subfloor system or raised panels, I would confirm the full assembly with both manufacturers. Layering materials without checking compatibility can trap moisture where it is difficult to discover.
Consider Floor Height and Temperature
Before installation, measure door clearances, stair risers, baseboards, and the transition to adjoining rooms. Adding underlayment or insulated panels changes finished-floor height and could create awkward or unsafe transitions.
A basement slab can also feel cold underfoot. The right approved insulating system may improve comfort, but foam thickness and cushioning are not interchangeable. The completed assembly must support the laminate and manage moisture correctly.
Installing Laminate Flooring in a Basement
Condition the Room and Planks Properly
Keep the basement within the flooring manufacturer’s required temperature and humidity range before, during, and after installation. Some products require a specified acclimation period; others do not. Follow the exact cartons and instructions rather than assuming every laminate needs 48 hours.
Allow the Floating Floor to Move
Most click-lock laminate is installed as a floating surface. It must not be pinned tightly against walls, support posts, pipes, or built-in cabinets. Expansion gaps allow normal movement as temperature and moisture conditions change.
A 3/8-inch perimeter space appears in several manufacturer instructions, but the requirement for your flooring controls. Use spacers, stagger plank end joints as directed, and install transition profiles where the maker requires them.
Treat Edges Without Trapping the Floor
Follow the specified finishing details around doorways and edges. Some water-resistant products require compressible backer rod and flexible silicone at the perimeter to resist surface spills while preserving movement.
That does not mean filling every expansion joint with rigid caulk or screwing trim through the planks. Fixed obstructions can stop a floating floor from expanding and cause buckling.
Laminate vs. Other Basement Flooring Options
Laminate is attractive when the basement is consistently dry and the goal is a comfortable wood-look finish. When moisture is unpredictable, another material may be a better investment.
| Flooring option | Main advantage | Main basement limitation | Best fit |
|---|---|---|---|
| Laminate | Realistic wood appearance and good scratch resistance | Fiberboard core can swell after moisture exposure | Dry, controlled living spaces |
| Rigid-core luxury vinyl plank | Generally more tolerant of surface water | Water can still collect underneath; substrate rules still apply | Busy rooms with occasional spills |
| Porcelain tile | Tile itself tolerates water well | Cold, hard underfoot; grout and substrate still need attention | Utility and moisture-prone areas |
| Sealed or finished concrete | No plank core to swell | Can feel cold and expose surface imperfections | Simple, practical basement finishes |
None of these materials fixes a wet basement. Even waterproof vinyl can conceal moisture that damages nearby walls, trim, or furnishings.
How to Keep a Basement Laminate Floor in Good Shape
I would treat humidity control as routine maintenance, not a one-time installation task. Monitor a hygrometer during seasonal changes, keep gutters clear, inspect pipes, and run a properly sized dehumidifier when needed.
Use mats at exterior entrances, protect furniture feet, and clean with the method approved for the exact laminate product. Avoid leaving puddles or using a steam mop unless the manufacturer expressly allows it.
I also recommend documenting a simple “before and after rain” inspection: check the same wall-floor corners, humidity readings, and any musty smells after major storms. Small changes are easier to act on before they turn into damaged flooring.
Watch for raised seams, darkened edges, unexplained buckling, or persistent odors. These can indicate moisture intrusion, although poor flatness or missing expansion gaps may cause similar symptoms. Find the underlying reason before replacing individual boards.
One final distinction matters: a floor can remain visually attractive while the space beneath it is damp. That is why I would take repeat moisture problems seriously even if the top surface looks fine.
Common Basement Laminate Mistakes Worth Avoiding
The biggest mistake in a laminate flooring basement makeover is buying flooring first and checking the concrete later. Another is assuming that a built-in pad replaces a vapor retarder, or that a “waterproof” label permits installation in a room that regularly floods.
I would also avoid covering damp carpet with laminate, ignoring a seasonal humidity spike, using excessive underlayment to hide uneven concrete, and sealing a floating floor so rigidly that it cannot move.
There is a practical cost lesson here. Material savings disappear quickly if the substrate must be repaired after the new floor is installed. Spend the first part of the budget on investigating moisture and flattening the surface; the decorative finish should come afterward.
Final Thoughts
Laminate flooring can make a dry basement feel like a true extension of the home, but its long-term performance depends more on the slab and humidity than on the plank design. I would start with a moisture history, room-humidity readings, and the test required for the specific product.
If those checks pass, choose below-grade-approved laminate and follow its barrier, flatness, and expansion requirements. If they do not, correct the moisture problem before committing to a finished floor.
Frequently Asked Questions
Can you put laminate flooring directly on a concrete basement floor?
Yes, if the product permits below-grade installation and the concrete passes its moisture and flatness requirements. Many systems also require a vapor barrier and approved underlayment.
Do I need a vapor barrier under laminate in the basement?
Often, yes. Many brands require 6-mil polyethylene or an approved moisture-barrier underlayment over concrete; check the exact installation instructions.
Is waterproof laminate safe for a basement?
Only in a basement that meets the product’s moisture limits. Waterproof surface claims do not mean the flooring can withstand groundwater, flooding, or persistent moisture underneath.
What humidity level is best for basement laminate flooring?
For general moisture control, the EPA recommends 30%–50% indoor relative humidity when possible. Follow the laminate manufacturer’s specified operating range as well.
Is laminate or vinyl plank better for a basement?
Laminate is a strong choice for reliably dry spaces; rigid-core vinyl is generally more forgiving of surface spills. Neither should cover unresolved moisture problems.