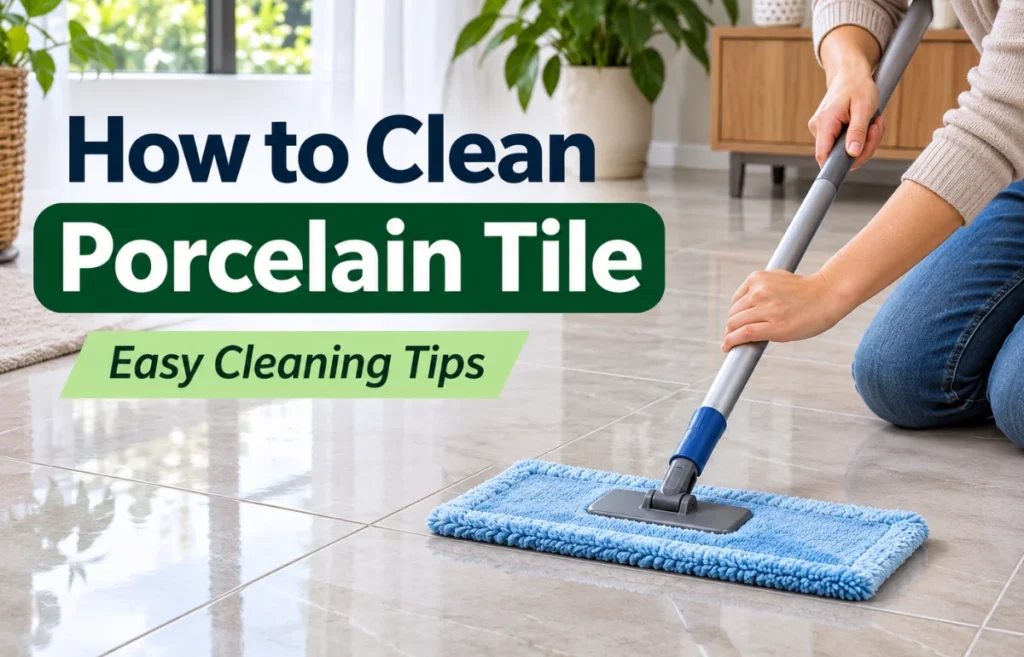
If you’re wondering how to clean porcelain tile, the safest everyday method is simple: remove loose dirt, mop with warm water and a pH-neutral cleaner made for tile, rinse away the cleaner, and dry the surface with a clean microfiber cloth. For stubborn spots, let a suitable cleaner work for the time stated on its label before gently scrubbing with a soft brush. Avoid acidic cleaners, abrasive pads, and anything that could harm the grout or tile finish.
The Tile Council of North America defines porcelain as a dense ceramic tile with water absorption of 0.5% or less under standard testing. That makes it resistant to moisture and everyday stains, but not immune to dirt, residue, or scratches.
I focus on two things whenever I explain porcelain care: the tile’s finish and the grout between the tiles. Cleaning both correctly is what keeps the whole floor looking good.
Know What Kind of Porcelain Tile You Have
Before choosing a cleaner, I check whether the surface is glossy, matte, textured, or unglazed. All are porcelain, but they don’t behave exactly alike under a mop.
Glazed porcelain has a protective fired-on surface that generally releases soil easily. Matte tile hides reflections but may show a cloudy film when detergent is left behind. Polished porcelain reveals streaks and fine scratches more readily. Textured tile has tiny ridges that trap grit, especially near entrances and in showers.
Don’t Forget the Grout
Grout is often the weak point in an otherwise tough tiled surface. Traditional cement-based grout is more porous than porcelain and can absorb spills, discolor, or wear under acidic cleaning. Epoxy grout generally resists staining better, although it still collects surface dirt.
If I don’t know what grout was installed, I choose a pH-neutral tile-and-grout cleaner rather than gamble with vinegar or a heavy-duty chemical.
I also look for loose grout, cracks, and failing sealant before adding water. Cleaning won’t fix those problems, and excessive moisture can make an existing problem worse.
What You’ll Need to Clean Porcelain Tile
I prefer a small cleaning kit over a cupboard of sprays. For most homes, the essentials are:
- A soft broom, microfiber dust mop, or vacuum with a hard-floor setting
- Two buckets, or one bucket plus a supply of fresh rinse water
- A clean microfiber mop and several absorbent cloths
- Warm water and a pH-neutral cleaner labeled safe for porcelain and grout
- A soft nylon brush for grout lines or textured areas
- Gloves when required by the cleaner’s label
I keep a separate clean cloth for drying polished tiles so grit doesn’t go back onto the surface.
How to Clean Porcelain Tile Floors Properly
The order makes more difference than the amount of cleaning solution. I use the following approach for normal household dirt and footprints.
1. Remove Dust, Sand, and Crumbs First
Sweep or vacuum the entire area, paying attention to corners, baseboards, and the edges of rugs. Use a hard-floor vacuum attachment rather than a beater bar that could drag particles across the surface.
Don’t mop over grit. When sand gets caught beneath the mop, it can behave like an abrasive, particularly on polished tile. Dry removal also keeps crumbs from turning into muddy streaks.
2. Mix a Mild Cleaning Solution
Fill a bucket with warm water, then add the amount of pH-neutral tile cleaner specified on the label. More cleaner does not mean more cleaning power. An overly strong mixture is more likely to leave a tacky or cloudy coating.
For a floor with only light dust, plain warm water may be enough. If you use a different product, check that its label allows use on your particular tile finish and grout.
I would rather repeat a gentle clean than use an unapproved product once.
3. Mop in Manageable Sections
Dip the microfiber mop, wring it until damp rather than dripping, and work in small sections. Move dirt toward an area you haven’t cleaned yet, instead of walking back over the wet floor.
On visible spills or stuck-on grime, apply the approved cleaner and allow only the label-recommended contact time. Gently loosen the spot with a soft cloth or nylon brush. Never let the cleaning solution dry on the tile.
Change the wash water when it becomes cloudy. A bucket of gray water isn’t cleaning anymore; it is spreading the soil around.
4. Rinse Away Remaining Cleaner
Go over the cleaned section with fresh water and a clean mop head. This extra pass is especially useful on dark, glossy, and large-format porcelain tiles, where residue catches the light.
A sticky feel after drying often signals leftover cleaner.
5. Dry the Surface and Check the Result
Wipe the floor with a clean, dry microfiber cloth or mop. Drying reduces water spots and lets you see whether the stain is gone or simply hidden by moisture.
Keep people off wet tile until it is dry because even a normally slip-resistant floor may become slippery when wet.
Then check the surface from the side, where streaks are easier to notice.
Best Cleaning Method for Each Porcelain Finish
Here’s the quick comparison I use when choosing between a mop, cloth, and brush.
| Porcelain finish | Best routine approach | What to watch for |
|---|---|---|
| Glazed | Damp microfiber mop with a neutral cleaner; rinse | Residue along grout lines |
| Polished or glossy | Soft mop, minimal cleaner, thorough drying | Fine grit, streaks, abrasive pads |
| Matte | Neutral cleaner followed by a fresh-water rinse | Cloudy cleaner buildup |
| Textured or anti-slip | Soft nylon brush plus a neutral cleaner | Dirt trapped in surface grooves |
| Unglazed | Manufacturer-approved neutral tile cleaner | Oil marks and finish-specific care requirements |
For textured tiles, I lightly brush along the surface pattern rather than pressing harder with a flat mop. On glossy tile, I do the opposite: keep friction low, rinse carefully, and buff with a clean cloth.
How to Deep Clean Porcelain Tile and Remove Stains
Deep cleaning should address the substance causing the mark. A greasy kitchen splash and white shower scale require different treatments, even if both look like stubborn stains.
First, blot a fresh spill instead of spreading it. Test any new cleaner in an inconspicuous spot. Read the label for finish compatibility, dilution, dwell time, and rinsing instructions.
For older stains, several controlled cleaning passes are safer than aggressive scrubbing.
| Problem | First method to try | When to change approach |
|---|---|---|
| Grease or cooking oil | pH-neutral tile cleaner and warm water | Use a porcelain-and-grout-safe degreaser if approved |
| Soap scum | Neutral bathroom tile cleaner and soft sponge | Choose a manufacturer-approved soap-scum remover |
| White mineral spots | Wipe and dry; use a grout-safe cleaner made for deposits | Seek product-specific advice before using acidic descalers |
| Shoe scuffs | Damp microfiber cloth and gentle rubbing | Try a cleaner approved for the finish |
| Dark grout lines | Neutral grout cleaner and soft nylon brush | Investigate staining, worn sealer, or damaged grout |
| Post-installation haze | Check installer and grout manufacturer’s guidance | Use only a compatible haze remover after proper curing |
Grease in the Kitchen
I start with a neutral cleaner and warm water because fresh cooking oil often lifts without a stronger product. For older grease, a grout-safe degreaser may help when the label approves it for the finish.
Follow the product’s dilution and rinse instructions rather than pouring concentrated cleaner onto the floor.
Check around the stove, where grease can hold dust.
Soap Scum and Hard-Water Marks
Bathroom porcelain often looks dull because soap residue and minerals have dried on the surface. A soft sponge and a compatible bathroom tile cleaner usually handle ordinary soap film.
Rinse well and squeegee or towel-dry the wall afterward.
Hard-water deposits can be tougher. Although acidic descalers dissolve minerals, acid can attack cement grout and may harm certain glazed or polished finishes.
I avoid the common suggestion to spray vinegar everywhere. Instead, I check the tile and grout manufacturers’ recommendations before selecting a deposit remover.
Stained Grout and Black Spots
Apply a grout-safe cleaner to the lines, agitate gently with a nylon brush, and rinse thoroughly. Don’t assume dark grout means dirt: some discoloration comes from absorbed pigment, worn sealer, or moisture problems.
If black spots return rapidly in a shower, check ventilation, drying, and any damaged caulk.
Surface cleaning doesn’t solve moisture trapped behind a failing joint. Persistent growth, loose tile, or damp walls deserves a closer inspection rather than stronger chemicals.
Grout Haze After Installation
A pale film on new porcelain may be grout haze, not household dust. Its removal depends on whether the grout is cementitious or epoxy, the tile finish, and how long the installation has cured.
I wouldn’t attack a new floor with vinegar or an unidentified acid cleaner. Contact the installer or follow the grout manufacturer’s haze-removal directions.
Some products require specialized removers and precise timing, and using the wrong one can damage the finish or joints.
Cleaning Porcelain Tile in Different Rooms
Kitchen Floors and Backsplashes
The kitchen challenge is usually sticky residue, not water. Wipe food splashes promptly, dust-mop the floor frequently, and give the cooking area extra attention when mopping.
On a backsplash, apply cleaner to a soft cloth rather than spraying directly into electrical outlets or open joints.
Bathroom Floors and Shower Walls
In the bathroom, I put drying on the same level as washing. Use a squeegee on shower walls after bathing, ventilate the space, and clean soap buildup before it hardens.
Keep water away from damaged caulk and grout until the repair is addressed.
Entryways and Outdoor Porcelain
Entrance tiles receive sand, mud, and grit that can grind into the surface. Let thick mud dry enough to lift without smearing, then remove the solids before wet cleaning. Use doormats to reduce the amount tracked indoors.
For outdoor porcelain, check that your particular tile and installation are designed for exterior exposure.
Avoid assuming a pressure washer is safe for every grout joint or edge; use the manufacturer’s cleaning directions.
Cleaning Mistakes That Make Porcelain Look Worse
Many dull-looking floors aren’t worn out. They’re coated with products that never should have been left behind.
Using Vinegar or Lemon Juice as an Everyday Cleaner
Acidic home remedies may remove some mineral deposits, but routine use can damage cement-based grout and certain tile finishes.
I don’t recommend vinegar as a universal porcelain cleaner, even when an online recipe calls it “natural.” Natural doesn’t automatically mean compatible.
Mixing Bleach With Other Products
Never mix bleach with acids, ammonia, or other cleaning chemicals. Dangerous fumes can result.
Routine bleach use is also unnecessary for most porcelain floors and may affect grout color or sealers.
If disinfection is genuinely needed, choose a product labeled for the surface and follow its instructions exactly.
Scrubbing With Abrasive Powders or Rough Pads
Baking soda is often described as a harmless grout scrub, but gritty pastes and forceful scrubbing can alter delicate finishes.
Steel wool and harsh scouring powders are a bigger risk. I start with a soft brush and an appropriate cleaner before considering anything more abrasive.
Leaving Soap, Wax, or Polish Behind
Oil soaps, waxes, and shine-enhancing floor products can leave films that attract dirt or change slip resistance.
Porcelain doesn’t need a decorative coating to look clean. Use less product, rinse it off, and let the tile’s original finish do the work.
Assuming Every Tile Needs Sealer
Most glazed porcelain tiles don’t require routine sealing. Some polished or specialty porcelain surfaces have different recommendations, and cement-based grout may benefit from a compatible penetrating sealer.
Check the tile and grout product instructions before applying anything; the wrong sealer can create another haze to remove.
Steam-Cleaning Without Checking the Installation
Steam can be suitable for some porcelain installations, but high heat and moisture may be inappropriate around certain sealers, movement joints, or damaged grout.
I would confirm approval from the tile, grout, and steam-cleaner manufacturers first, and never hold steam on one spot for too long.
Why Porcelain Tile Still Looks Dirty After Mopping
Before buying a stronger cleaner, I use a simple two-area check. On one small patch, wipe with fresh warm water and dry it. On an adjacent patch, use the approved cleaner, rinse, and dry. Compare both in the same light.
If plain water improves the appearance, detergent residue may be the issue. If neither patch changes a cloudy mark, look for mineral deposits, old sealer, construction haze, or permanent finish damage.
If grime gathers only in the grout or textured grooves, switch from a flat mop to gentle targeted brushing.
The feel offers clues: sticky suggests residue, while gritty suggests missed dry soil.
A Realistic Porcelain Tile Cleaning Schedule
- Daily or as needed: Wipe spills quickly and remove obvious crumbs or tracked-in grit.
- Several times a week: Dust-mop busy kitchens, hallways, and entryways; less-used rooms may need it less often.
- Weekly or as needed: Damp-mop with an approved neutral cleaner, then rinse and dry.
- Monthly: Check grout, corners, and textured tiles for buildup; spot-clean only where necessary.
- Occasionally: Inspect grout and caulk for damage, and reassess any sealer according to its manufacturer’s instructions.
The right frequency depends on shoes, pets, foot traffic, and local dust. A home with a sandy entrance may need more dry cleaning than one with a quiet upstairs bathroom.
Keep Porcelain Tile Clean With Less Work
For me, the best answer to how to clean porcelain tile is also the simplest long-term habit: remove grit before it scratches, use a compatible neutral cleaner, rinse thoroughly, and dry the surface.
Match your tools to the finish, and treat grout as its own material.
Start with one small area today; once you see which method leaves it clean and residue-free, use the same routine across the room.
Frequently Asked Questions
What is the best thing to clean porcelain tiles with?
A pH-neutral cleaner labeled for porcelain tile and grout, warm water, and a microfiber mop are the safest routine choices. Rinse and dry afterward.
Can you use vinegar to clean porcelain tile?
I wouldn’t use vinegar routinely. Its acidity can damage cement grout and some tile finishes; a neutral cleaner is a safer default.
How do you clean porcelain tile without leaving streaks?
Remove grit first, use only the recommended amount of cleaner, rinse with fresh water, and dry with clean microfiber.
Can I use a steam mop on porcelain tile floors?
Sometimes, but check the tile, grout, sealer, and appliance instructions first. Avoid steam around damaged joints or unapproved installations.
Does porcelain tile need to be sealed?
Most glazed porcelain does not. Some polished or specialty tiles may, while cement grout often benefits from sealing if its manufacturer recommends it.