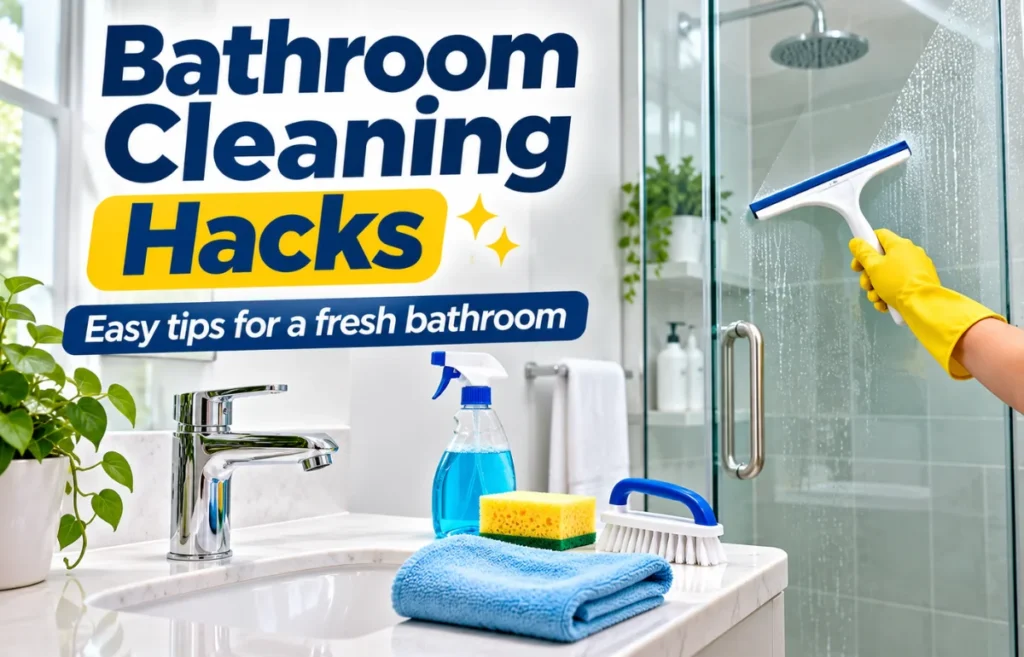
Bathroom cleaning hacks are practical shortcuts that help remove soap scum, hard-water stains, grime, odors, and everyday messes with less scrubbing. Instead of reaching for the strongest chemical in the cupboard, I focus on choosing the right tool for each surface, allowing cleaners time to work, and preventing dirt from building up again. A microfiber cloth, gentle detergent, squeegee, and soft brush can handle surprisingly much of the job.
The best bathroom cleaning hacks aren’t about making everything spotless in five minutes. They’re about making the next cleaning session easier. Whether you’re dealing with cloudy shower doors, a stained toilet bowl, or damp corners that never seem to dry, these practical methods will help you clean more effectively without putting your fixtures at risk.
Before You Clean, Identify What’s Actually Dirty
I find it useful to think about bathroom grime as several different problems, not one big mess. A chalky white deposit needs a different approach from a greasy film. That distinction saves both time and wasted cleaning products.
| What you notice | Likely cause | Better first approach |
|---|---|---|
| White, rough rings near taps | Hard-water minerals | Surface-safe mineral remover |
| Sticky, dull film on shower walls | Soap scum and body oils | Mild detergent and soft sponge |
| Dark spots that return in damp corners | Possible mold or mildew | Moisture control and appropriate cleanup |
| Slow shower drainage | Hair and product buildup | Remove hair mechanically |
| Dull film on a mirror | Spray residue and fingerprints | Lightly damp microfiber, then dry cloth |
Start by moving bottles and toothbrush holders out of the way. Dust hair and loose debris from dry surfaces before spraying anything. Otherwise, you’re turning dry dust into muddy streaks that need another pass.
One distinction matters: cleaning removes visible dirt, while disinfecting uses a product labeled to kill specified germs. The CDC recommends cleaning first and following a disinfectant’s stated contact time when disinfection is needed.
My nonnegotiable safety rule: never mix cleaning products. Bleach must not be combined with vinegar, ammonia, toilet cleaners, or other chemicals. Use ventilation, follow labels, and test unfamiliar products on a hidden area.
Shower and Bathtub Cleaning Hacks
1. Keep a Squeegee Inside the Shower
The simplest shower cleaning trick happens after bathing, not on cleaning day. Pull a squeegee down the glass and tiles to remove standing droplets. Finish by wiping the bottom ledge, where water tends to collect.
2. Treat Soap Scum Before Hard-Water Marks
Cloudy shower glass can carry two layers: oily soap residue and mineral deposits. Wash away the oily layer with warm water, a little dish detergent, and a non-scratch sponge. Rinse completely.
If chalky spots remain, use a glass-safe hard-water cleaner according to its label. On compatible plain glass, a short application of diluted white vinegar may help, but keep acids away from stone, unprotected metal finishes, and vulnerable grout. Never combine vinegar with another cleaner.
3. Unclog Showerhead Nozzles Gently
When spray becomes uneven, mineral particles may be blocking the rubber nozzles. First rub the nozzles gently with your fingers or a soft cloth while the water is off. If the showerhead is removable, consult its care instructions before using any descaling product.
I skip the popular overnight vinegar-bag trick for plated or specialty finishes. Long acid exposure can damage some coatings, and a replacement showerhead costs far more than a little extra care.
4. Clean Grout With a Soft Brush, Not Force
Apply a manufacturer-approved tile-and-grout cleaner, give it the labeled dwell time, and work along grout lines with a soft nylon brush. Rinse away residue and dry the surface.
Avoid metal brushes and repeated harsh-acid treatments. They can wear down grout, especially where the joints are already cracked. If grout crumbles or water gets behind tiles, cleaning alone won’t solve the problem.
5. Know When Stained Caulk Needs Replacing
Black marks embedded deep in silicone sealant may not disappear with surface cleaning. If the sealant is peeling, splitting, or permanently discolored, replacing it is often more sensible than applying stronger chemicals.
Remove failed caulk properly, let the joint dry, and use a bathroom-rated replacement compatible with the surface. Recurring staining can indicate a leak or poor airflow, so investigate the moisture source too.
6. Lift Dirt From Shower-Door Tracks
Sliding-door tracks collect hair, shampoo, and grit in places a sponge can’t reach. Remove loose debris with a vacuum crevice attachment or dry brush. Then use mild soapy water and a small brush to loosen residue.
Toilet Cleaning Hacks That Make a Real Difference
7. Let Toilet-Bowl Cleaner Do the Work
Apply a toilet cleaner designed for your bowl, including beneath the rim, then leave it for the label’s recommended time. Scrub with a dedicated toilet brush and flush.
For stubborn mineral rings, choose a toilet-bowl descaler compatible with the porcelain. Don’t scrape with metal tools or mix products in the bowl. If another cleaner was used earlier, flush thoroughly and follow product instructions before changing cleaners.
8. Pay Attention to Hinges and the Flush Handle
Seat hinges, bolt caps, and the underside of the seat are common hiding places for splashes. Use a small soft brush or cloth with mild detergent to reach the edges, then wipe with clean water and dry.
For shared bathrooms or illness in the household, use an appropriate disinfectant on compatible high-touch surfaces, observing its wet contact time. A quick spray-and-immediate-wipe may not disinfect effectively.
9. Clean Around the Toilet Base Before Mopping
Dust and hair gather behind toilets and around the base. Remove those dry particles first, then wipe the exterior and floor junction with a separate cloth reserved for toilet-area cleaning.
If odor persists despite cleaning, check for a loose toilet, moisture around the base, or a damaged seal. Fragrance can disguise the smell, but it cannot repair a plumbing problem.
10. Use Separate Cloths for the Toilet Zone
I like a simple two-zone system: one set of cloths for sinks, mirrors, and counters; another for toilets and the nearby floor. It reduces the chance of spreading grime from the dirtiest area to cleaner surfaces.
Launder reusable cloths according to their care labels, dry them completely, and wash your hands after removing cleaning gloves.
Sink, Faucet, and Mirror Cleaning Hacks
11. Remove Toothpaste Before It Hardens
Toothpaste flecks are easiest to lift when fresh. Wipe the sink basin and splashback with a damp microfiber cloth after brushing, especially near the drain and faucet base.
12. Restore Faucet Shine Without Scratching
Start with a damp cloth and a drop of dish soap. Rinse and buff dry with clean microfiber. This removes fingerprints and body oils without risking plated surfaces.
For persistent white buildup, use only a descaler approved for that specific faucet finish. Chrome, brushed nickel, brass, and matte-black coatings may have different care requirements. Don’t assume vinegar is safe for all of them.
13. Check the Faucet Aerator for Weak Flow
A sluggish faucet might have mineral sediment trapped in its aerator. If the design allows removal, follow the manufacturer’s directions, catch the small parts, and rinse out loose particles.
Replace worn washers or screens as needed.
14. Spray the Cloth, Not the Mirror
Cleaner sprayed directly onto a mirror can seep toward its edges and leave moisture where the reflective backing is vulnerable. Apply a small amount of suitable glass cleaner to microfiber instead.
Wipe in overlapping passes and finish with a second dry cloth.
15. Clean the Accessories That Touch the Counter
Soap dispensers, toothbrush cups, and storage trays leave rings that make an otherwise clean vanity look untidy. Lift everything, wash the contact areas, and dry both the counter and accessory bottoms.
16. Clear Hair From Drains Before Reaching for Chemicals
A slow drain is often a physical blockage. Remove visible hair from the stopper or use a suitable plastic drain tool, following the drain’s design and local disposal guidance. Wear gloves and discard the debris.
Avoid stacking drain-cleaning chemicals or adding a second product when the first fails. If water backs up repeatedly, a plumber may be needed to inspect the trap or pipe.
Floors, Fabrics, and Hidden Corners
17. Vacuum or Sweep Before Wet Mopping
Wet mopping over hair turns it into clumps that cling to grout and corners. Use a vacuum suitable for hard flooring or a dry microfiber mop first. Then clean with a floor product approved for your tile, vinyl, or stone.
Use a lightly damp mop rather than soaking the floor. Excess water can settle around baseboards and into damaged joints, especially in small bathrooms with limited airflow.
18. Wash Bath Mats Before They Smell Musty
Bath mats trap moisture from bare feet and shower splashes. Check the care tag, launder washable mats regularly, and dry them fully before placing them back on the floor.
19. Give Shower Curtains Room to Dry
After showering, pull the curtain or liner across the rod rather than leaving it folded into a wet bundle. Spreading the material increases airflow and reduces damp creases.
20. Track Down Odors Instead of Covering Them
A bathroom odor can come from a dirty drain cover, wet towels, a trash bin, or a plumbing fault. Clean the obvious sources first and check whether a little-used drain trap has dried out; running water may restore its water seal.
Prevention Hacks That Cut Future Scrubbing
21. Manage Humidity Like a Cleaning Task
Run the exhaust fan or open a window during showers, and continue ventilating until the room dries. Fix dripping fittings and wipe puddles on shelves and windowsills promptly.
The EPA advises keeping indoor humidity below 60%, ideally around 30–50%. A basic humidity meter can tell you whether a room stays damp long after bathing. If mold covers more than roughly 10 square feet, or keeps returning because of hidden water damage, seek professional guidance.
22. Keep a Small, Surface-Safe Cleaning Kit Nearby
A caddy with microfiber cloths, a soft brush, mild detergent, and an approved bathroom cleaner reduces the effort of getting started. Keep toilet tools separate and store all products securely away from children and pets.
23. Use a One-Minute Reset After Busy Mornings
A daily reset doesn’t have to be a full clean. Hang damp towels, wipe the sink rim, clear water from the counter, and open the shower curtain so it dries.
Which Cleaner Works Best for Which Surface?
Before trying a viral DIY trick, match the product to both the mess and the material. The American Cleaning Institute’s surface-care guidance emphasizes gentle tools and appropriate cleaners, particularly for marble, fiberglass, and other finishes that scratch or react with acids.
| Surface | Sensible routine choice | Avoid |
|---|---|---|
| Ceramic or porcelain tile | Neutral or tile-approved cleaner, soft brush | Harsh abrasives and aggressive scrapers |
| Natural stone | Stone-safe, pH-neutral cleaner | Vinegar, lemon, acidic descalers |
| Acrylic or fiberglass tub | Nonabrasive cleaner and soft sponge | Scouring pads, metal scrapers |
| Shower glass | Nonabrasive glass cleaner, squeegee | Abrasive powders; acids near sensitive trim |
| Finished metal taps | Mild soap, water, soft cloth | Unapproved descalers and scratchy pads |
A popular vinegar-and-baking-soda mixture deserves skepticism. The fizz looks dramatic, but the ingredients react and largely neutralize each other. It’s usually more effective to choose one appropriate cleaner for the specific deposit rather than mix ingredients for the bubbles. Never combine household cleaning chemicals experimentally.
A Realistic Bathroom Cleaning Schedule
My favorite approach is to separate quick prevention from deep cleaning. Otherwise, even a small bathroom turns into a weekend project.
| Frequency | Tasks to prioritize | Typical time to allow |
|---|---|---|
| After showers | Squeegee glass, spread curtain, ventilate | 1–2 minutes |
| Daily or as needed | Wipe sink splashes, hang towels, clear counter | 1–3 minutes |
| Weekly | Clean toilet, basin, mirror, touchpoints, floor | 20–35 minutes |
| Monthly or when buildup appears | Detail tracks, check grout and caulk, clean accessories | 20–40 minutes |
These times are planning estimates, not promises. Household size, bathroom design, and mineral content in the water all affect how quickly dirt returns.
I work from high to low: mirror and shelves first, sink and toilet next, floor last. I also keep cloths for toilet-area cleaning apart from the rest. That order prevents dirty drips or falling debris from ruining a surface I’ve already cleaned.
Common Bathroom Cleaning Mistakes Worth Avoiding
The biggest mistake is treating every stain with the same harsh product. Acid can etch marble. Rough pads can scratch acrylic. An overly wet mop can leave water trapped in corners. Using more chemical doesn’t guarantee a better result.
Another mistake is confusing a cleaner with a disinfectant. For routine household dirt, detergent and physical wiping are often enough. When disinfection is appropriate, select a product suitable for the surface and follow its label exactly, including contact time and any rinsing instructions.
Finally, don’t ignore recurring problems. If the same corner develops spots every week, focus on ventilation or hidden moisture. If a toilet base repeatedly smells, check the plumbing. Good bathroom cleaning hacks remove the cause whenever possible, not just the visible evidence.
Final Thoughts
An easier-to-clean bathroom begins with small, consistent habits: dry wet surfaces, choose gentle tools, and treat soap film differently from mineral buildup. Start with three changes this week—keep a squeegee in the shower, separate toilet cloths, and wipe the sink daily. Once those habits stick, you’ll spend less time battling stains and more time enjoying a fresh, comfortable bathroom.
Frequently Asked Questions
What is the fastest way to clean a bathroom?
Clear clutter, spray appropriate cleaners, wipe the mirror and sink while products work, then scrub the toilet and finish with the floor. Keep toilet cloths separate.
What is the best homemade cleaner for bathrooms?
Mild dish soap diluted in water works for many washable, nonporous surfaces. Test first, rinse as required, and use a dedicated product for mineral scale or disinfection.
How do I remove hard-water stains from shower glass?
First remove soap film with mild detergent. Then use a glass-safe mineral remover as directed, rinse well, and dry with a squeegee to slow future spotting.
How often should I deep-clean my bathroom?
Clean high-use fixtures and floors about weekly, adjusting for household size. Inspect grout, drains, tracks, and caulk monthly or whenever buildup appears.
Can I use vinegar to clean every bathroom surface?
No. Vinegar can damage natural stone and some finishes or grout. Never mix it with bleach or other cleaning chemicals; check manufacturer guidance first.