
A floating laminate floor is a laminate flooring system in which individual planks connect to one another but are not glued, nailed, or screwed to the subfloor. Most modern versions use click-lock edges that create one continuous surface over a suitable underlayment. The floor can expand and contract as indoor conditions change. “Floating” describes the installation method, not an unstable floor.
The important comparison is with glued installation. Glue can join plank edges, or it can bond an entire floor directly to the subfloor. Those methods have different consequences. I’ll explain when adhesive makes sense and why floating installation is usually best for laminate.
What Actually Makes Laminate a Floating Floor?
Laminate planks typically combine a protective surface, decorative image, wood-fiber core, and balancing layer.
The joints connect neighboring boards, but the underside stays unattached. An approved pad may sit beneath them. Trim hides the expansion gap without pinning the flooring down.
I find it helpful to picture the installed planks as one connected sheet rather than hundreds of independently fixed pieces. This explains why a tight fit against a wall, kitchen island, or pipe can create trouble several feet away.
Three Installation Methods People Often Confuse
- Click-lock floating laminate: Planks mechanically lock together. No adhesive is normally needed at the joints or beneath the floor.
- Glue-together floating laminate: Adhesive bonds traditional tongue-and-groove edges, but the completed floor still floats above the subfloor. This is more common in older or specialized systems.
- Full-spread glue-down laminate: Adhesive bonds the plank backs to the subfloor. This is unusual for laminate and should only be considered when the exact product and manufacturer explicitly permit it.
This distinction matters more than the word “glue” on an estimate. Before accepting an estimate, I would ask: Where, exactly, will the adhesive go?
Floating vs. Glued Laminate: The Main Differences
| Feature | Floating click-lock laminate | Glued-joint floating laminate | Full-spread glue-down laminate |
|---|---|---|---|
| Connection | Mechanical locking edges | Adhesive between plank edges | Adhesive to the subfloor |
| Attached to subfloor? | No | No | Yes |
| Typical availability | Common modern method | Older or specialty systems | Uncommon; product-specific |
| Installation pace | Generally faster | Requires adhesive handling and curing | Requires detailed adhesive and substrate preparation |
| Underlayment | Product-approved pad or attached backing | Typically an approved pad | Only if specifically permitted by the bonding system |
| Later plank replacement | Often possible with careful disassembly | More difficult because joints are bonded | Usually more disruptive |
| Main concern | Movement space and intact locks | Glue application and curing | Compatibility, moisture, and warranty |
The table reveals something easy to miss: glued-joint laminate and click-lock laminate share the same basic floating behavior. Both need space to move around fixed objects.
The European Producers of Laminate Flooring describes floating installation as the preferred method and says full-surface gluing is generally not used. For an ordinary home renovation, I would treat the manufacturer-approved floating method as the starting point, not the compromise.
Why Floating Laminate Moves—and Why That Is Normal
Laminate’s wood-based core responds to changes in humidity and temperature. The movement may be small, but a connected floor covers a large area. If the perimeter is blocked, the pressure has to go somewhere.
That pressure can show up as peaking joints, raised sections, or buckling in the middle of a room. It does not necessarily mean the planks were defective. Sometimes the installer simply left too little clearance or fastened trim through the flooring.
Many instructions specify an expansion space of approximately 1/4 to 3/8 inch, but the required gap varies by product. The same rule applies around doorframes, pipes, columns, and fixed features. Trim hides the gap.
Doorways Are Movement Boundaries, Not Just Openings
A long hallway feeding several rooms may look like one easy surface to cover. Structurally, though, the narrow doorways can change how the connected floor expands and shifts.
Some products require T-moldings at doorways or after certain room dimensions. Those limits vary. I would draw a simple room-to-room layout and mark every doorway, direction change, and fixed island before deciding where transitions belong.
This small “movement map” prevents a surprisingly expensive mistake: buying a seamless look that the selected laminate system cannot safely support.
The Subfloor Matters More Than the Installation Label
A floating floor does not need adhesive to stay down, but that does not mean it can hide major imperfections. The base still needs to be structurally sound, clean, dry, and flat within the flooring maker’s tolerances.
Flat is not the same as level. A gently sloping room can be flat, while an otherwise level surface may contain dips and ridges that stress click-lock joints every time someone walks across them.
For example, one Mohawk laminate installation guide limits unevenness to 3/16 inch over a 10-foot span. That is an example, not a universal standard. I would check the actual carton instructions before judging whether grinding or patching is necessary.
Can a Floating Laminate Floor Go Over Existing Flooring?
Often, yes—over certain sound, flat, firmly attached materials such as approved tile or resilient flooring. Cracked tile, loose vinyl, and thick cushioned surfaces need closer attention. Carpet and its padding must be removed.
The North American Laminate Flooring Association lists existing laminate as unsuitable beneath a new laminate floor. Two moving layers can create instability, and hidden moisture or weak areas remain uncorrected.
I would check that the old surface is secure, doors still clear the added height, and the new product approves that substrate.
Underlayment and Moisture Control Are Not Optional Details
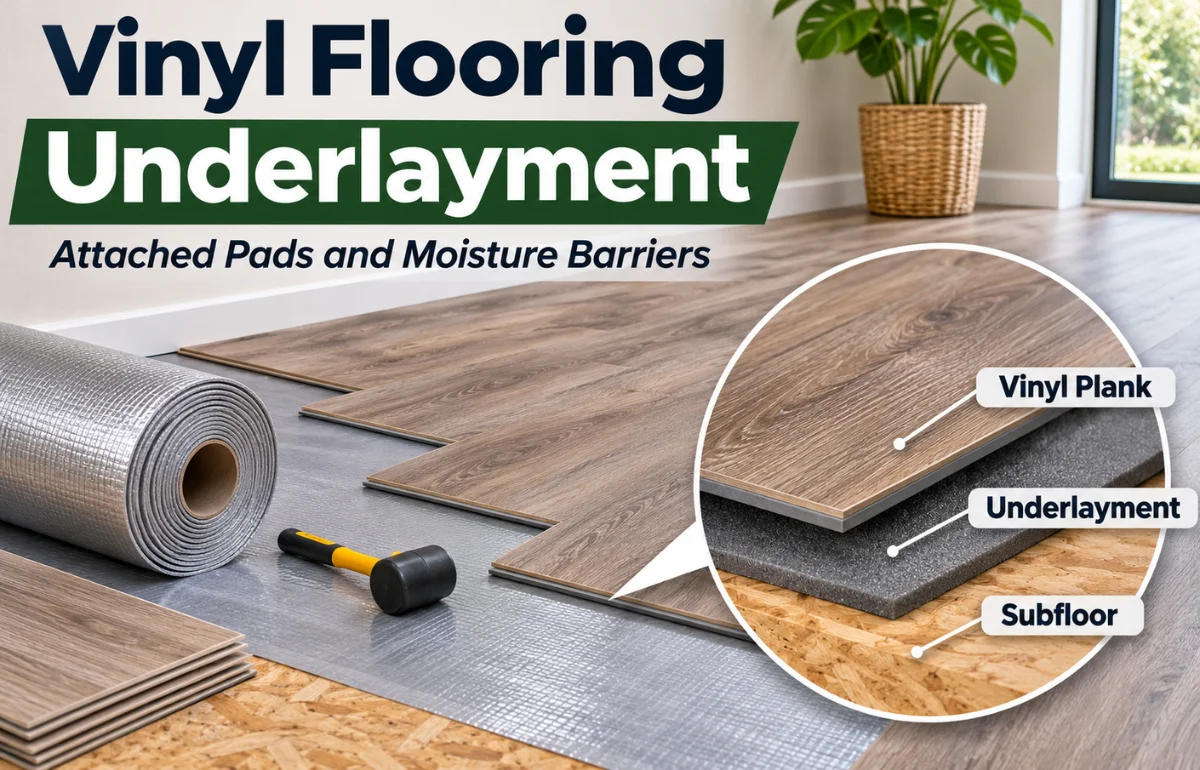
Underlayment supports the floor, manages some footfall sound, and can make walking feel less sharp. It is not a substitute for repairing a poor subfloor. In fact, an overly soft or overly thick pad may let joints flex more than they should.
Some boards have attached padding; others need a separate layer. An unauthorized second pad can stress locks and affect the warranty.
Concrete presents another issue: moisture vapor can travel upward through a slab even when the surface looks dry. Many laminate systems require a 6-mil polyethylene vapor barrier or an approved moisture-control underlayment over concrete. Overlap and seal seams exactly as instructed.
A vapor barrier is not a cure for active water intrusion, persistent dampness, or a leaking foundation. The moisture source must be addressed first. Likewise, I would not put plastic sheeting over a wood subfloor unless the flooring and assembly instructions call for it; trapping moisture in wood can create separate problems.
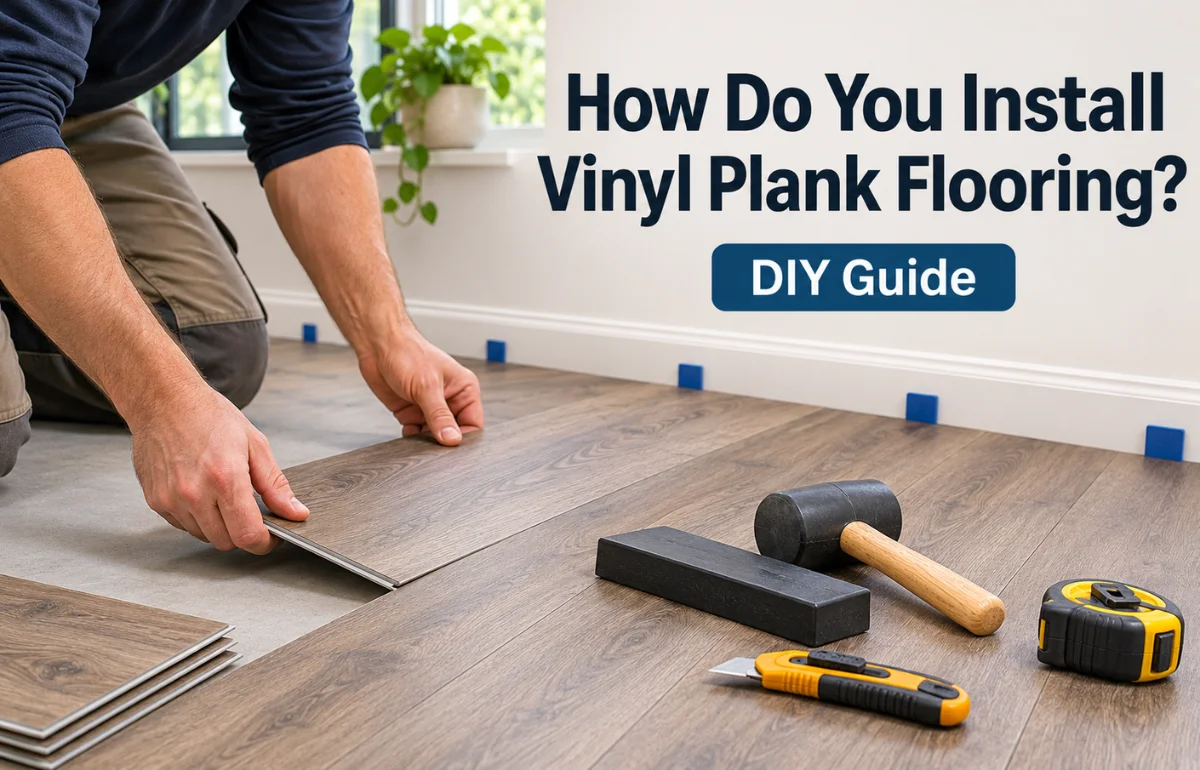
How Floating Click-Lock Laminate Is Installed
The most consequential work happens before laying the first plank.
1. Verify Conditions and Plan the Layout
Inspect the subfloor, test moisture as required, correct high and low spots, and confirm that indoor temperature and humidity fall within the product’s limits. Follow its acclimation instructions rather than assuming every laminate needs the same waiting period.
Measure the room in both directions. Plan the first and last row so the final strip is not awkwardly narrow. Include an allowance for offcuts, pattern matching, and damaged boards. Allow roughly 10% extra for typical waste; complex layouts may need more.
2. Prepare the Layers Beneath the Planks
Remove debris and install the specified vapor-control layer or underlayment. Keep it smooth, with seams assembled as directed. Do not stack generic foam pads to make up for dips.
Also check door clearances and undercut door casings where the manufacturer allows. The flooring must slide beneath the casing while keeping its concealed expansion space.
3. Lock the Planks Without Forcing Them
Begin where the planned layout calls for, use spacers along fixed boundaries, and connect the boards using the correct angle or drop-lock motion for that product. Stagger end joints by the maker’s minimum distance so short seams do not line up repeatedly.
A tapping block or pull bar may help with approved profiles, but aggressive hammering can damage the locking edges. If a joint refuses to close, I would inspect it for debris or misalignment rather than hit it harder.
4. Finish Without Trapping the Floor
Remove spacers, install the required transition profiles, and attach baseboards or quarter-round to the wall—not through the laminate. Use flexible sealant at specified wet-area edges while preserving the movement detail prescribed by the manufacturer.
Fixed cabinetry and kitchen islands should not generally be installed on top of a floating laminate surface. Plan around them instead, unless the chosen system expressly provides another approved detail.
When Does Glued Installation Make Sense?
Full-spread bonding can create a more directly attached feel and change how impact noise is perceived in the room. That sounds appealing, especially to someone worried about a hollow footstep sound.
But this is not a reason to glue down ordinary click-lock laminate. The adhesive may be incompatible with the backing, the floor may be unable to move as designed, and the warranty may no longer apply. Quick-Step, for example, warns that gluing its laminate to the subfloor voids the warranty, while allowing certain stair applications.
There are specialist exceptions. Some older laminate systems use glued joints, and certain products or projects may have an expressly approved bonded method. Those situations require the exact flooring, adhesive, substrate preparation, moisture measurements, and curing procedure to be considered as one system.
My rule is simple: if the installation manual only shows floating assembly, do not invent a glue-down alternative. For a project that truly needs a bonded floor, compare a glue-down product designed for that purpose, such as an appropriate engineered wood or vinyl system.
Which Method Costs More Over Its Lifetime?
Floating laminate usually avoids floor adhesive, trowels, and adhesive curing time. That often reduces installation labor, although extensive subfloor repairs, premium acoustic underlayment, and extra transitions can change the final price.
Glued-joint systems add adhesive and more demanding assembly. Full-spread bonding may require specialist substrate preparation and labor, and removal can be considerably more involved. I would compare total project costs rather than price per square foot of planks alone.
| Cost or ownership factor | What to look for |
|---|---|
| Upfront materials | Planks, approved underlayment, moisture barrier, trim, transitions |
| Preparation | Moisture testing, repairs, leveling, old-floor removal |
| Labor | Layout complexity, fitting around doorways, approved adhesive work if any |
| Repairability | Whether damaged boards can be accessed or replaced without disturbing large areas |
| Future renovation | Ease of removing the surface and condition of the subfloor afterward |
One overlooked benefit of floating installation is reversibility. A click-lock floor may be dismantled from an accessible edge, and some undamaged boards can potentially be reused if the locking system survives. That flexibility helps when layouts change or boards need replacing.
It is not a promise of effortless repairs. A damaged board in the center of a large room can still require substantial work, and some repairs involve cutting out a board and fitting a replacement using a manufacturer-approved method.
Common Problems and What They Usually Mean
I prefer diagnosing the symptom before recommending glue, extra padding, or a replacement plank. Each apparent flooring problem points to a different part of the installation.
- Bouncy spots: Check for low areas, unsuitable underlayment, or insufficient subfloor support. Glue on the surface will not repair the cause.
- Joints opening: Inspect damaged locks, excessive movement, a poor layout, and places where the floor is restrained.
- Raised or tented boards: Look for missing expansion clearance, pinned-down trim, or moisture-related swelling.
- A hollow walking sound: Review underlayment density, subfloor flatness, footwear noise, and expectations. Floating does not have to mean unstable.
- Swollen edges: Investigate spills, appliance leaks, wet cleaning, or moisture coming through the subfloor before replacing boards.
I would also distinguish a slightly noisy floor from one with visible joint movement. Sound alone may be a comfort issue; repeated joint deflection can point to a durability problem worth correcting promptly.
Choosing the Right System for Your Room
For bedrooms and living rooms with a suitable subfloor, modern click-lock floating laminate is often a practical choice. It installs efficiently, offers many finishes, and does not require bonding the entire surface permanently to the home.
For kitchens, I would focus on the specific laminate’s water-resistance rating, edge-sealing instructions, and appliance-leak exposure. “Waterproof” marketing should not be interpreted as permission to leave standing water indefinitely or ignore subfloor moisture.
For basements, moisture testing and the manufacturer’s below-grade approval come first. A basement with flooding history or recurring dampness may not be a sensible laminate location at all. Bathrooms and other very wet spaces require products explicitly rated for those conditions.
On stairs, the installation is a different structural and safety problem. Individual tread pieces may require secure fastening and purpose-made stair nosings; a loose floating assembly is not an acceptable substitute for the manufacturer’s stair method.
Caring for a Floating Laminate Floor After Installation
Use a soft broom, suitable vacuum attachment, or lightly damp cleaning method approved for the product. Remove spills promptly, protect chair legs with felt pads, and avoid dragging heavy furniture across the surface.
Do not flood the floor or assume a steam mop is safe. Keep indoor humidity within the recommended range and watch for leaks near sinks, dishwashers, and exterior doors. Those everyday habits help preserve both the surface and its joints.
Frequently Asked Questions
Is a floating laminate floor better than a glued floor?
For most laminate products, floating installation is the intended and easier-to-service method. A bonded alternative is only appropriate when the manufacturer approves it.
Does floating laminate flooring need underlayment?
Usually, yes, unless the product has an approved attached pad or specifies another assembly. Always follow its underlayment and moisture-barrier instructions.
Can I glue down click-lock laminate flooring?
Not unless the exact manufacturer explicitly permits it. Gluing a floating-only product can interfere with its design and void the warranty.
How much expansion gap does floating laminate need?
Common requirements are around 1/4 to 3/8 inch at fixed boundaries, but your flooring manual determines the correct clearance and transition details.
Can a floating laminate floor be installed over tile?
Often, if the tile is firmly bonded, dry, flat, and approved as a subfloor by the laminate manufacturer. Loose tiles and uneven grout areas must be corrected first.
The Bottom Line
A floating laminate floor succeeds because the planks connect securely while the entire surface retains room to move. Glue between joints is not the same as glue beneath planks, and that difference affects installation, maintenance, and warranties.
Before buying, choose your exact laminate product, read its installation guide, and check the subfloor and moisture conditions. That short review will tell you whether a straightforward floating installation is right for the room—and help you avoid a costly adhesive mistake.