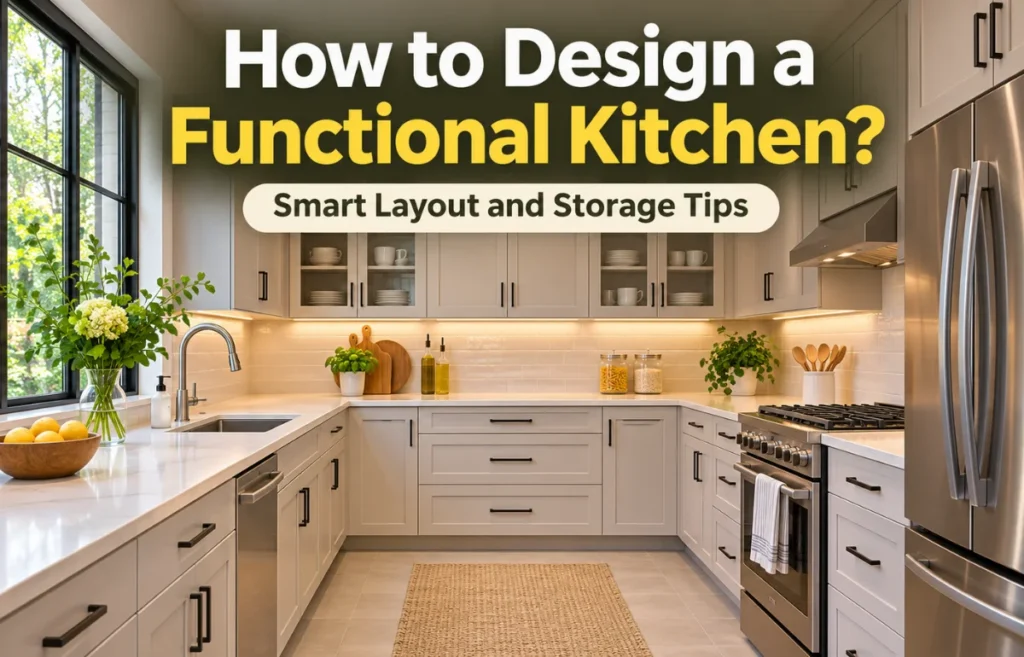
Learning how to design a functional kitchen starts with arranging the space around the way you actually cook. A functional kitchen is one where food storage, washing, preparation, cooking, and cleanup happen in a logical sequence, with enough room to move safely and reach everyday essentials.
To create one, choose a layout that fits the room, keep the sink, refrigerator, and stove conveniently connected, provide uninterrupted prep space, organize storage by activity, and plan lighting and ventilation from the beginning.
I would prioritize those decisions before choosing cabinet colors or a backsplash. Beautiful finishes matter, but a kitchen feels truly successful when making breakfast, unloading groceries, and cleaning up require less effort.
Start With Your Daily Routine, Not a Floor Plan
Before measuring cabinets, I would write down what happens in the kitchen on a typical weekday. Do you cook from scratch, reheat meals, pack lunches, entertain friends, or share the room with another cook? Those habits determine where the space should work hardest.
Notice the small frustrations in your current kitchen. Perhaps the coffee supplies are far from the kettle, the trash bin blocks a drawer, or someone always stands in front of the refrigerator while you prepare dinner. Each complaint suggests a design fix.
Make a short list of nonnegotiables: a generous chopping area, accessible cookware, space for a second person, or somewhere to set grocery bags. An island may be appealing, but a clear route through the room is usually more valuable.
Measure the Room as It Really Exists
Measure walls, ceilings, windows, doors, plumbing, outlets, ducts, and fixed obstacles.
Measure appliances with their doors open, not just their closed dimensions. A refrigerator that technically fits can still fail if its door hits a wall or prevents a drawer from opening. Check manufacturer installation clearances before finalizing cabinetry.
Choose a Kitchen Layout That Supports Movement
The best kitchen layout depends less on trends and more on room shape, traffic, and how many people use it. I prefer layouts that give each task a clear home without forcing anyone through the cooking area to reach another room.
| Layout | Best suited to | Main advantage | Watch out for |
|---|---|---|---|
| Single-wall | Studios and narrow rooms | Keeps the floor open | Limited prep space and storage |
| Galley | Long, compact rooms | Efficient work zones on two sides | Conflicting appliance doors |
| L-shaped | Small to medium open rooms | Flexible workflow and an open corner | Underused corner storage |
| U-shaped | Rooms with three usable walls | Plenty of counters and cabinets | Tight aisles if overfilled |
| Island layout | Larger kitchens with ample clearance | Extra prep space and social seating | Congestion around stools and doors |
A compact galley can outperform a large island kitchen when everything is within reach.
If you want an island, draw its footprint along with stool positions and open appliance doors. If the aisle becomes cramped, consider a narrower island, a movable prep cart, or a peninsula instead.
Connect the Sink, Refrigerator, and Stove Without Obsessing Over the Triangle
The kitchen work triangle links the refrigerator, sink, and cooking surface to reduce unnecessary walking.
The National Kitchen & Bath Association (NKBA) planning guidelines recommend a total triangle distance of no more than 26 feet, with individual legs between 4 and 9 feet. Treat that as a planning guide, not a reason to force appliances into awkward positions.
In a kitchen with several users, I focus on the sequence: retrieve, rinse, chop, cook, and serve. Avoid crossing a busy doorway midway.
Protect the Path of a Hot Pan
Here is a check I find especially useful: imagine lifting a heavy, hot pot from the stove. Where can you put it down immediately? Is the landing area clear, or must you turn around a seated person?
A clear path for hot cookware matters more than a perfectly symmetrical triangle.
Leave Enough Clearance for People and Open Doors
A kitchen can look spacious until the dishwasher, oven, and drawers are open.
These NKBA figures are recommended planning dimensions, not universal legal minimums. Confirm local building rules and accessibility requirements for your project.
| Kitchen feature | Recommended space | Why it helps |
|---|---|---|
| Work aisle, one cook | At least 42 in (107 cm) | Room to prepare and move |
| Work aisle, multiple cooks | At least 48 in (122 cm) | Reduces collisions |
| General walkway | At least 36 in (91 cm) | Keeps traffic moving |
| Main prep counter | 36 in wide × 24 in deep (91 × 61 cm) | Continuous chopping space beside sink |
| Main sink landing areas | 24 in on one side; 18 in on other | Space for dishes and ingredients |
| Refrigerator landing area | Typically 15 in nearby | Somewhere to set food down |
| Cooktop landing areas | 12 in on one side; 15 in on other | Safer handling of hot items |
A seating area needs its own clearance. NKBA suggests about 44 inches behind a seated diner where someone must walk past comfortably. Measure from the counter edge, not the chair’s tucked-in position.
Also test the dishwasher while someone stands at the sink, and a refrigerator door while a nearby drawer is open. Those everyday combinations expose problems a simple floor plan misses.
Organize the Kitchen Into Five Practical Zones
Learning how to design a functional kitchen also means grouping storage by task, so you spend less time reaching, searching, and walking.
1. Food Storage
Keep the refrigerator, pantry staples, and grocery drop-off space reasonably close. Store breakfast foods together if mornings are rushed, and place frequently used ingredients at comfortable reaching height.
2. Washing and Cleanup
Put dish soap, sponges, bins, and everyday dishes near the sink and dishwasher. A pull-out waste bin beside the prep area can catch peelings without repeated trips across the room.
3. Food Preparation
Reserve the clearest stretch of countertop for cutting, mixing, and assembling meals. Knives, chopping boards, mixing bowls, and commonly used seasonings should be within easy reach.
4. Cooking
Position pots, pans, spatulas, and heat-resistant utensils near the stove. Keep oils handy but away from heat sources, and avoid storing items that children frequently need directly beside hot burners.
5. Serving and Drinks
Store plates and glasses near the dishwasher or dining area. If several people make tea or coffee, a dedicated drink station away from the main prep zone can prevent morning traffic jams.
Make Storage Easier to Use, Not Simply Bigger
More cabinets do not automatically create an organized kitchen. Deep cupboards can hide cookware, while shelves installed too high become storage for things nobody uses.
I favor full-extension drawers for cookware and dishes because you can see everything without kneeling. Adjustable shelves accommodate changing needs.
Use vertical dividers for baking trays and cutting boards. Reserve narrow pull-outs for bottles or spices only where they genuinely solve a problem; they can cost more while holding less than a well-designed drawer.
For corners, compare pull-out mechanisms with simple shelves. Store heavy appliances between knee and shoulder height when possible.
Plan for the Items You Will Buy Later
One overlooked detail is storage growth. If every shelf is full on installation day, a new blender or a few extra containers will migrate to the counter. I would leave a little adjustable space rather than customizing every compartment too tightly.
Choose Appliances Around Your Cooking Habits
Do not let oversized appliances dictate the entire room. A large range or double-door refrigerator may look impressive but consume valuable workspace in a modest kitchen.
Compare usable capacity, energy use, noise, maintenance, and reliability. Check fridge-door direction and oven landing space.
Think about appliance relationships, too. The dishwasher belongs close to the sink, while a microwave used by children may be more accessible at an appropriate counter-level location than above a range. Follow the manufacturer’s clearances and installation instructions for every appliance.
Electrical planning belongs here, before the backsplash goes in. Map outlets for the kettle, toaster, mixer, and occasional appliances. Ask a qualified electrician to design countertop circuits and protective devices according to local electrical codes; never improvise extension cords around water and heat.
Use Layers of Lighting So Every Task Is Visible
A single ceiling fixture rarely lights a kitchen evenly. Your body can cast a shadow over the exact counter where you are chopping vegetables.
I would plan three layers: general ceiling lighting for movement, focused task lighting over counters and the sink, and softer accent lighting for atmosphere. Under-cabinet strips are especially helpful because they illuminate the work surface directly.
Choose wipe-clean fixtures and consistent color temperature. Give task and ambient lights separate switches.
Pick Surfaces That Match the Amount of Maintenance You Want
A practical kitchen should be easy to clean on an ordinary Tuesday, not only look good in photographs. When comparing countertop materials, consider resistance to heat, stains, scratches, and the maintenance each finish requires.
Quartz is often convenient for low-maintenance households, while natural stone may need sealing depending on the material. Laminate can be budget-friendly, provided you protect its edges and joints from moisture. No countertop is immune to damage, so use trivets and cutting boards.
For flooring, prioritize slip resistance, water tolerance, and comfort underfoot. Smooth, washable backsplashes simplify cleanup behind the stove. Cabinet fronts with intricate grooves may look charming, but they also collect more grease and dust than simpler profiles.
Treat Ventilation as a Core Part of the Design
Cooking creates moisture, odors, grease particles, and other indoor pollutants. A range hood that exhausts outdoors generally removes cooking emissions more effectively than one that only recirculates filtered air.
The U.S. Environmental Protection Agency advises running an externally vented hood while cooking and for 10–20 minutes afterward. Choose a hood that fits the cooking surface and has suitable airflow without being so loud that nobody uses it.
Plan the duct route early, including make-up air where required by the system or local code. If you cook frequently with high heat, ventilation deserves serious attention before decorative upgrades.
Design for Comfort and Changing Needs
A kitchen should fit the people using it, not assume everyone is the same height or moves in the same way. Standard counters may suit one person and feel uncomfortable to another.
Consider a lower seated work area, reachable storage, easy-grip handles, lever-style faucets, and drawers that open with minimal effort. Rounded counter corners can reduce painful bumps in tight spaces.
For wheelchair users, accessible layouts may require substantially different clearances and knee space. The U.S. Access Board’s kitchen standards provide requirements for covered accessible spaces; they do not automatically apply to every private home. Work with an accessibility professional when specific mobility needs are involved.
Spend Your Budget Where It Improves Daily Use
When considering how to design a functional kitchen on a budget, I prioritize layout, plumbing, wiring, ventilation, and durable cabinets. These are expensive to correct after installation.
Save on decorative details where possible. Existing cabinet boxes may only need new fronts or hardware, and a simple backsplash can still look polished. Keeping the sink and stove near existing service locations may reduce renovation costs, provided the layout remains sensible.
Leave a contingency for surprises behind walls or under flooring. A beautifully finished kitchen is not a bargain if fixing cramped clearances or poor wiring requires tearing it apart.
Test Your Design Before Ordering Cabinets
My favorite low-cost planning technique is a full-scale rehearsal. Mark cabinet fronts and island edges on the floor with painter’s tape. Use cardboard to represent an open oven or dishwasher door, then walk through a normal meal.
Pretend to unpack groceries, rinse vegetables, chop ingredients, take something from the oven, and load dirty dishes. Can a second person pass? Can you reach the bin without leaving the prep spot? Is there a safe place to set hot cookware?
Try the two-open-door test: open the most likely pair of appliance or cabinet doors at the same time. Then try a wet-hands test: can you reach soap, towels, and the waste bin without dripping across the room?
These tiny simulations can reveal expensive layout flaws before a single cabinet is installed.
Common Kitchen Design Mistakes to Avoid
A few choices repeatedly undermine otherwise attractive kitchens. The biggest is sacrificing working space for an island that does not fit. Another is filling every counter with permanently displayed appliances, leaving nowhere to prepare a meal.
I would also avoid placing the trash too far from the sink, choosing attractive but hard-to-clean materials without considering upkeep, and forgetting where appliance doors swing. Poor lighting and weak extraction can make even a spacious kitchen frustrating.
Finally, do not design only for guests. A quick weekday dinner is the real test.
Frequently Asked Questions
What is the most functional kitchen layout?
A galley or L-shaped layout is often efficient, but the best choice depends on room dimensions, traffic, and your cooking routine.
How much space should I leave between kitchen counters?
NKBA recommends at least 42 inches for one cook and 48 inches for multiple cooks in a work aisle.
How can I make a small kitchen more functional?
Prioritize continuous prep space, full-extension drawers, vertical storage, and appliances sized for the room. Skip an island if it blocks movement.
Is the kitchen work triangle still relevant?
Yes, as a starting point. In busy modern kitchens, clear task zones and unobstructed traffic matter just as much.
What should I plan first when designing a kitchen?
Start with your daily activities and accurate measurements. Set the layout and appliance positions before selecting finishes.
Final Thoughts
Understanding how to design a functional kitchen means making dozens of practical choices that support one another. Start with how you live, protect your prep space and walking routes, and make storage, lighting, and ventilation work together.
Before committing to cabinets, sketch your layout and act out one ordinary meal. That simple exercise may save you from the most expensive mistake of all: a kitchen that looks beautiful but is awkward to use.