
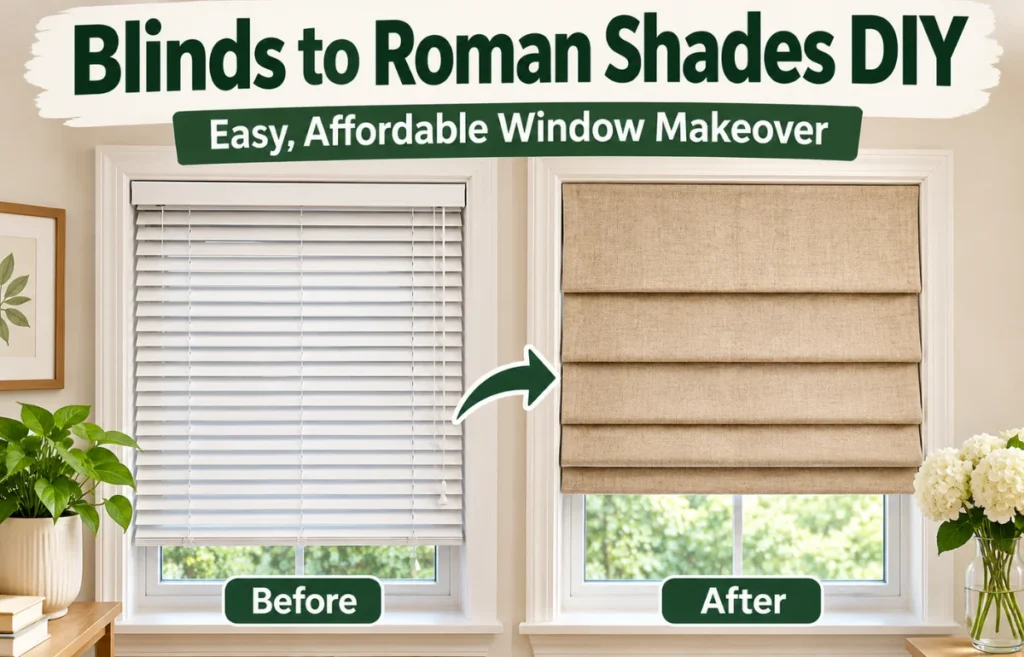
Blinds to Roman Shades DIY is the process of transforming the look of ordinary window blinds into a fabric Roman shade, a window treatment that forms neat horizontal folds. Instead of buying expensive custom shades, you use fabric, basic sewing or hemming supplies, and sometimes reusable parts from an existing blind. You can create a fixed decorative shade or a working version that raises and lowers with compatible Roman shade hardware.
Covering an old blind with fabric isn’t automatically the same as building a reliable Roman shade. Fabric weight, fold spacing, and cord safety matter as much as appearance. Here’s how I would approach it.
Why Convert Blinds Into Roman Shades?
Mini blinds are practical, but their narrow slats can make an otherwise warm room feel a little clinical. Roman shades add one continuous surface of color and texture, which helps tie together cabinetry, rugs, upholstery, and wall paint.
Fabric offers more choices than vinyl slats, and lining can improve privacy. Existing blinds may provide useful measurements or parts.
I like this idea for one window that needs a visual upgrade. But I wouldn’t sacrifice a working blind without checking privacy needs first.
Choose Your DIY Method Before Buying Fabric
A successful Blinds to Roman Shades DIY makeover starts with choosing how the finished shade will operate. Three approaches suit different needs.
| Method | What you get | Best use | Main limitation |
|---|---|---|---|
| Fixed faux Roman shade | Permanent decorative folds with no lift mechanism | Kitchens, entryways, layered windows | Doesn’t raise or lower |
| Fabric added to old mini-blind hardware | A low-cost working shade in some tutorials | Understanding older DIY techniques | Altering lift cords or slats can create safety and reliability problems |
| Fabric panel with a purpose-built cordless Roman system | Adjustable shade with designed-for-purpose hardware | Bedrooms, living rooms, daily use | Higher cost and more precise assembly |
I’d choose a fixed shade for decoration, and a purpose-built cordless Roman system with inaccessible internal cords for daily operation.
A Safety Check That Belongs at the Start
Traditional tutorials often tell readers to cut the ladder strings of a mini blind, remove most of its slats, and glue fabric onto those left behind. The result may look appealing, but altering the blind can expose inner lift cords or change how its safety features work.
The U.S. Consumer Product Safety Commission recommends cordless window coverings, especially in homes with young children. Importantly, a shade with no dangling pull cord may still have hazardous accessible cords on its back. A modified blind should not be assumed child-safe because it is labeled cordless.
Don’t cut lift cords, remove safety components, or improvise cord loops. Where children live or visit, choose coverings without accessible cords on any side and follow installation instructions.
Can You Reuse Parts From Old Blinds?
Yes, although the useful parts may not be the ones you expect. An old blind is excellent as a sizing reference, provided it fitted the window correctly. A sound mounting location may also help you decide where new brackets belong.
Intact vinyl slats can stiffen folds inside pockets on a fixed shade. Check for sharp edges; thin slats bow on wide windows, so I prefer proper shade ribs.
I’d recycle damaged slats and retire aging corded mechanisms rather than trying to turn them into a new lifting system. Reusing fabric-friendly parts is a budget win; reusing questionable hardware isn’t.
Gather Materials for Your Roman Shade Makeover
Start with a tape measure, pencil, straightedge, scissors, iron, marking tool, decorative fabric, and optional lining.
For a fixed shade, gather a tension rod or suitable mounting rod, hemming tape or matching thread, hand-sewing supplies, and optional lightweight battens. Fabric-safe adhesive can help with hems, but test it on a scrap; some glues bleed through or stiffen the visible fabric.
For a working shade, buy a compatible cordless Roman shade kit that includes the appropriate rail, lifting components, brackets, and weight bar. Use its specified ribs, tapes, attachments, and cord-protection components. Don’t assume parts from different brands will work together.
Before shopping, I list what can be reused safely and what needs buying. Small extras can erase the savings.
Measure the Window and Calculate Fabric
Inside Mount Versus Outside Mount
For an inside mount, measure the opening’s width at the top, middle, and bottom. Use the narrowest width. Then measure its height at the left, center, and right, noting the longest measurement so the shade can cover the opening. Check the depth available for the mounting hardware, plus clearance for handles and cranks.
For an outside mount, decide how far the fabric should overlap the opening. Roughly 1½ to 3 inches on each side is a useful starting point for limiting light gaps, although trim and nearby cabinets may require a different choice.
Never subtract an automatic clearance allowance from a kit measurement unless its instructions tell you to. Some manufacturers make their own deductions, while DIY systems require you to calculate a finished width yourself.
A Simple Fabric Calculation
Say your intended finished shade is 34 inches wide and 54 inches long. If your construction uses 2-inch allowances on each side and 3 inches at both the top and bottom, the initial fabric rectangle is 38 by 60 inches.
That’s a planning example, not a universal cutting pattern. Rod pockets, turnbacks, fabric pattern matching, and the lift kit’s design can change the amount required. I would mark the finished dimensions on paper before cutting anything, then confirm the seam allowances against the chosen construction method.
Pick Fabric That Folds Instead of Fighting You
A medium-weight cotton or cotton-linen blend is usually easier to handle than slippery satin or bulky upholstery fabric. It presses cleanly, accepts hems, and makes folds that look deliberate rather than puffy.
| Fabric or finish | Appearance | Practical consideration |
|---|---|---|
| Cotton or cotton blend | Crisp, casual folds | Press before measuring; prewash if care instructions allow |
| Linen blend | Relaxed, textured look | Creases are part of its character |
| Lightweight upholstery fabric | Structured and substantial | Check weight limits of the lift system |
| Decorative fabric with blackout lining | Better room darkening | Adds bulk and may increase the folded stack |
For kitchens, I favor washable fabrics that tolerate everyday dust and occasional splashes. In bedrooms, I prioritize privacy and light filtering, which may justify a separate lining.
Here’s a test that avoids disappointment: hold a fabric sample against the window during daylight, then check it again with the room lights on after dark. A fabric that looks opaque in the shop may reveal silhouettes at night.
Plan the Folds Before You Assemble Anything
Roman shades look best when their folds repeat at consistent intervals. For a simple decorative panel, sections around 8 to 12 inches deep can be a useful visual starting point, adjusted for the window height and fabric body. Working lift kits may specify very different spacing; those instructions take priority.
I mark proposed folds on a paper strip first. Moving pencil lines is easier than repositioning sewn pockets.
Raised fabric stacks at the window top and may block glass. Mark the expected stack with painter’s tape before committing.
Method One: Make a Fixed Faux Roman Shade
This is my preferred entry-level approach for anyone who wants the look of Roman shades without rebuilding a lifting mechanism. It can incorporate a few usable slats from retired blinds as fold supports, but it doesn’t depend on old cords.
1. Prepare the Fabric Panel
Cut the fabric using your measured dimensions and seam allowances. Press the side edges, fold them under, and sew or fuse the hems. Finish the bottom edge the same way.
Make a rod pocket at the top sized for your chosen rod, following the rod maker’s clearance guidance. If the shade will sit inside the window recess, check that the rod and finished fabric fit without scraping the frame.
2. Form and Secure the Folds
Lay the panel face down. Fold the fabric upward at your planned intervals until you like the layered appearance from the front. Pin through the side hems and add discreet hand stitches or tested fabric-safe adhesive at each fold to hold the arrangement permanently.
For a wider shade, add carefully placed hidden tacks toward the center to prevent the folds from sagging. If using reclaimed slats as battens, enclose them completely in stitched pockets; don’t leave exposed corners or use brittle pieces.
3. Install and Check the Finished Shape
Slide the rod through the top pocket, mount it securely, and straighten each fold by hand. Stand across the room to assess the result; tiny differences in fold depth are easier to spot from a distance.
A high-mounted fixed shade won’t provide full privacy. Pair it with an intact cordless shade or privacy film where needed.
Method Two: Make a Functional Cordless Roman Shade
A working Roman shade is more demanding because the fabric and the lift system must move together smoothly. I would build the textile panel myself but rely on a purpose-built mechanism rather than converting an old blind’s internal cords.
1. Select the Mechanism First
Choose a DIY-compatible system sized for the finished width, drop, and weight of your fabric. Check that its rear lifting cords are inaccessible or adequately enclosed as designed, and that all required safety components are supplied.
Read the complete assembly instructions before cutting the fabric. The manufacturer may specify the number and placement of ribs, an exact top attachment, and a particular bottom bar. Those details aren’t interchangeable between kits.
2. Sew the Face Panel and Lining
Cut the decorative fabric and lining according to the kit’s pattern. Keep the fabric grain straight so the bottom edge doesn’t twist. Sew and press the side hems, then finish the lower section to accommodate the specified weight bar.
If the kit allows removable fabric, I prefer that arrangement for easier cleaning. If it requires permanent attachment, test any adhesive on scraps and let it cure for the full time stated on the label.
3. Add the Fold Supports
Mark each batten location with a ruler, checking the distance from both side edges. Sew pockets or attach approved rib tape as instructed, then insert the supplied ribs. Consistent pocket placement is what keeps a flat Roman shade from looking lopsided.
Don’t add extra rings, leave cords exposed, or improvise the lift routing. A cord-free exterior alone doesn’t establish that the shade is safe, particularly if someone can reach loose cords at the back.
4. Attach, Mount, and Test
Connect the finished panel to the headrail using the kit’s approved fasteners. Install the brackets in a suitable structural surface, using anchors appropriate to the wall or frame. Keep the headrail level.
Operate the shade slowly through several full cycles. Watch for uneven lifting, rubbing, fabric catching at the brackets, or a bottom bar that tilts. If the lift doesn’t work as designed, stop and consult the manufacturer’s troubleshooting instructions rather than pulling harder.
Common Mistakes That Make DIY Roman Shades Look Homemade
Uneven Folds
When one side rises higher, the problem may be an out-of-level rail, uneven batten marks, or misaligned fabric. Check measurements before assuming the lifting mechanism needs adjustment. For a fixed shade, simply remove and reposition the hidden tacks.
Glue Marks on the Front
Heavy adhesive can soak through thin cotton and leave dark, rigid stripes. I test on a remnant, apply only the recommended amount, and keep glue away from working components. Sewing is often more forgiving in visible areas.
A Shade That’s Too Thick When Raised
Bulky lining, stiff hems, and closely spaced battens create a crowded stack. Make a small folded sample with all fabric layers before committing to the full panel. It’s a quick way to discover whether the finished shade will overpower a shallow window.
Light Leaking Around the Edges
Inside-mounted shades usually leave some side gaps. If room darkening matters more than showing the trim, an outside mount with additional overlap may be better. For bedrooms, I would also consider a separate light-blocking layer instead of expecting one decorative fabric panel to do everything.
Make the Finished Shade Look More Expensive
I prefer restrained details: a solid linen-look fabric, a narrow contrasting border, or a pattern aligned exactly across the center of the window. Oversized prints are harder to match and can disappear awkwardly into the folds.
For working shades, check folds fully lowered, halfway raised, and fully raised. The middle position exposes crooked folds. View fixed shades from the doorway and seating area.
Keep the bottom edge parallel to the sill. A simple, straight hem usually looks more polished than heavy trim, particularly on small windows.
Cleaning and Long-Term Maintenance
Use a soft brush attachment to dust, follow the care label, and spot-test cleaners. Keep glued hems and mechanisms dry.
Every few months, check mounting brackets, fold supports, and any approved safety components for looseness or wear. If the shade begins to jam or its cords become accessible, stop using it until the problem is corrected according to the manufacturer’s guidance.
Frequently Asked Questions
Can I turn regular mini blinds into Roman shades?
You can reuse certain parts or imitate the look, but cutting away slats and changing lift cords can introduce safety problems. A fixed shade or a compatible cordless Roman system is a better choice.
Can I make Roman shades without sewing?
Yes. A fixed faux shade can use fusible hemming tape and tested fabric adhesive to hold folds, although stitched folds generally withstand handling better.
What is the best fabric for DIY Roman shades?
Medium-weight cotton or a cotton-linen blend is a good starting point because it presses neatly and folds predictably. Match the fabric weight to your hardware.
How many folds should a Roman shade have?
There is no universal number. The window height, desired look, and lift system determine spacing; always follow the mechanism’s required layout for a working shade.
Are DIY Roman shades cheaper than buying custom shades?
They can be, especially fixed decorative versions. A functional cordless kit, lining, and quality fabric may narrow the savings, so compare the complete material cost before starting.
Give One Window a Thoughtful Upgrade
Blinds to Roman Shades DIY works best when you choose the right outcome before choosing fabric. For a decorative makeover, make a fixed shade and keep the construction simple. For everyday light control, invest in a compatible cordless Roman mechanism and follow its instructions exactly.
Start with one window, test your fabric in the room’s actual light, and make a paper fold plan. Those small decisions have more impact on the finished result than expensive trim ever will.