
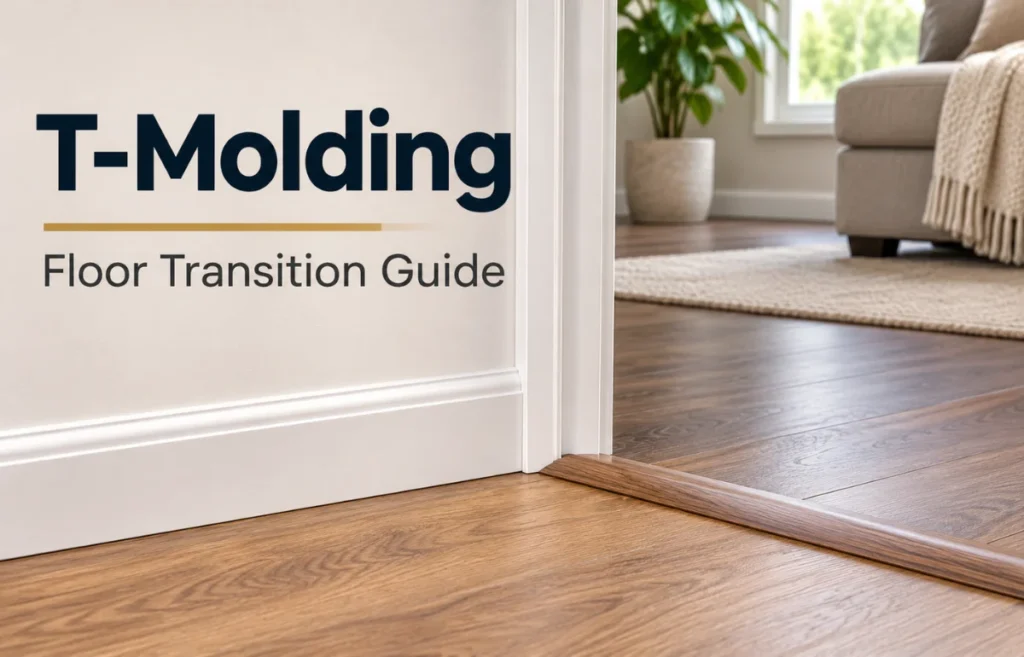
T-Molding is a T-shaped finishing strip that joins two flooring surfaces of approximately the same height while covering the space between them. Viewed from the end, its broad top resembles the horizontal bar of a “T,” and its narrow center stem fits into a gap or mounting track. It creates a neat transition between rooms and, when installed correctly, leaves room for certain floors to expand and contract.
You’ll commonly see T-molding between laminate, hardwood, engineered wood, and luxury vinyl flooring. The term also describes flexible edging used on furniture and arcade cabinets, although that product installs differently.
For floors, the key rule is simple: choose T-molding when the finished surfaces are level, not when one floor is substantially higher than the other.
A small strip can change how finished a room feels. I think of it as more than a decorative detail: it has to look right, stay secure, and avoid restricting the flooring beneath it.
Here is how I evaluate those requirements before choosing a profile.
How Does T-Molding Work?
A floor transition has two visible shoulders that overlap the flooring edges and a central stem that supports the strip.
Depending on the product, the stem snaps into a track, seats in adhesive, or attaches using a manufacturer-approved fixing system. The profile bridges the joint without needing the two floors to touch.
That last detail matters with floating floors. Laminate and click-lock vinyl can change dimensions as temperature and humidity vary.
A transition may conceal the required expansion space, but it must not clamp the planks so tightly that they cannot move. The correct gap and attachment method depend on the specific flooring and trim manufacturer.
T-molding also gives each room a visual stopping point. Instead of seeing an unfinished seam at a doorway, you see a controlled, intentional line.
Where Is T-Molding Used?
Doorways Between Rooms
This is its most familiar location. A strip can meet laminate in a hallway with laminate in a bedroom, or engineered hardwood with similarly high tile.
Centering the transition beneath the closed door usually makes the change less noticeable from either room.
Openings and Long Floor Runs
Some floating-floor systems require transition joints at particular doorways or after certain uninterrupted lengths. These rules vary considerably.
I would never assume that a floor can continue through every opening just because the planks click together.
Changes in Material, Not Necessarily Height
A tile-to-vinyl transition may need T-molding if the finished surfaces truly align.
But “both products are 6 mm thick” does not prove they will finish level: underlayment, mortar, adhesive, and subfloor preparation all affect final height.
Renovations With Separate Installation Areas
A well-placed profile can make a room-by-room flooring replacement practical.
It creates a clean boundary without requiring the neighboring room to be remodeled at the same time.
T-Molding vs. Other Flooring Transition Strips
These profiles are not interchangeable. Their shapes solve different problems, and using the wrong one can create a raised edge or a trip hazard.
| Transition type | Best use | Main difference |
|---|---|---|
| T-molding | Two finished floors at similar heights | Overlaps both edges and covers a center joint |
| Reducer strip | One floor noticeably higher than another | Slopes from the higher surface toward the lower one |
| End cap or square nose | Flooring stops at a fixed edge, such as a hearth | Finishes one exposed floor edge rather than joining equal floors |
| Threshold | Doorway or specific edge condition | Design varies; may handle clearance, sealing, or a surface change |
| Stair nose | Edge of a stair tread or landing | Designed for a stair edge, not an ordinary room-to-room seam |
My rule is to measure first and name the molding second.
A product labeled “universal transition” may adapt to several conditions, but it still needs to be configured for the actual floor heights.
What Materials Are T-Moldings Made From?
The best option usually matches the flooring’s appearance and the amount of wear the doorway receives.
| Material | Strengths | Trade-offs | Good fit |
|---|---|---|---|
| Solid wood | Natural grain; can sometimes be refinished | Responds to moisture; may require finishing | Hardwood interiors |
| MDF or laminate-wrapped core | Coordinated colors and wood-look patterns | Edges can be damaged by prolonged moisture | Dry rooms with laminate |
| Vinyl or PVC | Moisture-resistant surface; available in coordinated finishes | Can scuff or deform if poorly supported | Many luxury vinyl installations |
| Aluminum or other metal | Durable, slim-looking profiles | Exposed finish may not match wood grain | Busy doorways and modern interiors |
A matching color is not always the best visual choice.
If two rooms have contrasting floors, a neutral metal transition can look more deliberate than a wood-look strip that matches neither side.
I also check how the finish appears in daylight; showroom lighting can hide surprisingly obvious undertone differences.
How to Choose the Right T-Molding
Measure the Finished Floor Heights
Measure both surfaces from the same reference point after all underlayment and setting materials are accounted for.
If one side sits higher, check whether the specific T-profile tolerates that difference.
When the profile rocks, leaves an unsupported lip, or catches a shoe, a reducer is usually the better solution.
Check the Width and Gap Requirements
The top needs enough overlap to conceal the joint, but the stem and track must fit between the two flooring edges without blocking their movement.
There is no universal expansion-gap measurement for every T-molding or floor.
Follow the paired floor-and-trim instructions rather than copying a gap from another project.
Match the Profile to the Floor Construction
Floating laminate, click-lock vinyl, glue-down flooring, and nail-down wood are different systems.
For a floating installation, the transition hardware is generally anchored to the subfloor, not fastened through the moving planks.
Some products use clips or tracks; others specify adhesive. Do not mix methods simply because they seem stronger.
Think About Feet, Wheels, and Doors
Run your hand over a sample. A sharp or proud edge may be annoying for bare feet and more troublesome for wheelchairs, walkers, rolling luggage, or robot vacuums.
Also check the door’s bottom clearance through its full swing.
A molding that looks fine with the door open can scrape when the door closes.
For accessible routes in the United States, the ADA Standards generally allow vertical level changes up to 1/4 inch; changes above that and up to 1/2 inch require a suitable bevel.
These are accessibility rules, not permission to use an ill-fitting T-molding. Local requirements and the complete doorway design still matter.
How to Measure for a Clean Doorway Transition
I start with three measurements: opening length, floor-height difference, and the width available between the two floor edges.
Measure at several points, particularly in older homes where jambs and subfloors may not be square.
Mark where the door rests when closed. That position is often more useful than centering the strip on the visible opening.
Make sure the profile ends will tuck neatly around the door casing without pressing against the floating floor.
Before cutting, place a short sample of molding over the seam. Look at it from standing height, walk across it in both directions, and swing the door.
This simple dry-fit check can reveal a height or placement problem before adhesive makes corrections difficult.
Buy a strip long enough to cut as one continuous piece where possible.
Joining two short lengths across a narrow doorway introduces a visible seam and another potential point of movement.
How to Install T-Molding on a Floor
Installation details differ by brand, but the following sequence helps organize the job without overriding the manufacturer’s instructions.
1. Prepare the Opening
Remove construction debris, check that the subfloor is sound, and confirm the flooring edges are clean and stable.
If the new profile uses a track, make sure the track can sit flat.
Never use the transition strip to conceal a loose plank or an uneven substrate that needs repair.
2. Confirm the Expansion Space
Check the floor manufacturer’s required clearance at the joint.
The molding must cover that space while allowing the floor to move.
Do not fill an expansion gap with hard adhesive, grout, or other material unless the flooring system explicitly calls for it.
3. Cut and Dry-Fit the Strip
Measure twice, mark the finished face carefully, and cut using the blade recommended for the material. Use suitable eye protection and control dust.
A fine-tooth saw may work for many trims, but a manufacturer’s cutting advice takes priority, especially for brittle or wrapped profiles.
Set the piece in place without fastening it. Check the overlap, end clearance, and finished height.
Do not force a warped strip to sit flat by tightening fasteners through nearby flooring.
4. Secure the Track or Approved Base
For track-mounted products, fasten or bond the track to the subfloor as directed, leaving the designated room on either side.
On concrete, use an adhesive or anchors approved for that system.
Before drilling into any floor, check for radiant-heating pipes, electrical runs, or other hidden services.
For an adhesive-installed profile, use the adhesive and bonding surfaces the manufacturer specifies.
Attaching a floating-floor transition directly across both plank surfaces can restrict movement and lead to buckling or gaps.
5. Seat the Molding and Inspect It
Once the base is ready, press or tap the molding into position with the recommended tools.
Protect the finish rather than striking it directly with a metal hammer.
Clean away excess adhesive promptly and respect its curing instructions.
Finally, walk over the transition, inspect each edge, and open and close the door.
It should feel supported, not springy, and neither shoulder should lift when stepped on.
Common T-Molding Problems and How to Avoid Them
The Strip Pops Out
A loose track, damaged stem, incorrect clip size, or poorly fitted subfloor can cause a strip to release.
Check the connection before adding glue indiscriminately.
A repair that holds the profile down but locks a floating floor in place creates a different problem.
One Side Sits Too High
This usually points to mismatched finished-floor elevations or an incompatible profile.
Don’t sand a vinyl or laminate-wrapped shoulder as an improvised fix; the protective finish may be lost.
Reassess the transition shape.
The Floor Buckles Near the Door
First investigate whether the floating floor has enough expansion room and whether a screw, adhesive, or molding has pinned it.
Buckling can have other causes, including moisture or subfloor issues, so the trim should not automatically be blamed.
The Ends Look Rough
Door jambs are rarely perfect rectangles. A careful template can help produce a closer fit.
Undercutting a casing may be appropriate for some installations, but leave the required movement space and avoid weakening the trim or frame.
Water Collects Along the Seam
A water-resistant molding does not waterproof the joint beneath it.
In kitchens, laundry areas, and entryways, clean spills promptly and follow the flooring manufacturer’s moisture-protection details.
Don’t assume a bead of silicone is a safe universal solution for a floating-floor joint.
Does Every Floating Floor Need T-Molding at Doorways?
No. Requirements depend on the exact product, installation method, layout, room dimensions, and manufacturer.
Some systems specify a transition at narrow doorways or between separate rooms. Others permit continuous installation within defined limits.
This is where I would check the installation manual before buying trim.
Removing an unnecessary transition may create a cleaner appearance, but skipping a required movement joint could compromise the floor.
The correct answer is product-specific, not a universal yes or no.
T-Molding for Cabinets and Furniture Is Different
The same name also describes flexible T-shaped edge trim used on arcade cabinets, furniture, counters, and similar panels.
In that application, a barbed central spine presses into a routed slot along the panel edge.
It protects exposed material and adds a finished border; it does not join two floors.
Width refers to the panel edge the decorative cap covers, while slot width must match the particular product’s spine and barbs.
Buying by color alone is a common mistake.
Measure the panel thickness, check the manufacturer’s required slot cutter, and test the fit on scrap material before routing the actual cabinet.
On tight curves, the back of the spine may need carefully spaced relief cuts, depending on the product.
Avoid cutting through the visible face.
This is one reason flooring T-molding and furniture edge T-molding should never be treated as interchangeable supplies.
How to Maintain T-Molding and Know When to Replace It
Routine care is straightforward: remove grit, wipe with a cleaner approved for the finish, and avoid soaking the joint.
Grit trapped at the shoulders can scratch adjacent flooring, while repeated standing water can affect vulnerable cores and subfloors.
Inspect busy thresholds occasionally.
Movement underfoot, cracked corners, exposed fasteners, or a newly raised edge deserve attention.
If the strip is damaged but the track and flooring are sound, replacing just the top profile may be possible.
If the underlying floor is swelling or moving abnormally, resolve that issue first.
The least expensive trim is not necessarily the best value.
A compatible, properly supported transition is usually cheaper than repairing damaged plank edges or replacing a strip that repeatedly comes loose.
Final Thoughts
T-Molding does two jobs at once: it gives adjoining floors a finished appearance and, where required, conceals a joint that allows movement.
The best results come from matching the profile to the actual floor heights, the flooring system, and the traffic passing over it.
Before purchasing, measure the finished surfaces, confirm the manufacturer’s expansion requirements, and dry-fit a sample at the doorway.
Those few checks can prevent the most common and frustrating transition problems.
Frequently Asked Questions About T-Molding
What is T-molding used for?
It is mainly used to connect floors of similar height, cover a flooring joint, and create a neat transition at doorways or openings.
Can I use T-molding between tile and laminate?
Yes, if their finished surfaces are close enough in height for the specific profile and the laminate retains its required expansion space.
Do I glue T-molding to the floor?
Follow the trim maker’s instructions. Floating-floor systems typically require the track or base to attach to the subfloor rather than locking the moving planks in place.
What is the difference between T-molding and a reducer?
T-molding bridges two nearly level surfaces; a reducer makes a sloped transition between surfaces with different heights.
Can T-molding be replaced without replacing the flooring?
Often, yes. If the floor edges and mounting track remain sound, you may only need a compatible replacement strip.