
How to Prep a Room for Painting starts with clearing the space, protecting floors and furniture, inspecting the walls, cleaning away dirt, repairing damage, and preparing surfaces for paint. Once patches are smooth and dry, decide whether primer is needed, mask vulnerable edges, and arrange your tools and ventilation. Good preparation helps paint adhere evenly, reduces visible flaws, and makes the actual painting easier to control.
A freshly painted room can look disappointing when old nail holes, greasy patches, or rough edges show through the new color. I would rather spend an extra hour identifying those problems than discover them after the first coat. The trick is knowing which preparation tasks matter for your particular walls, instead of automatically sanding and priming everything.
Check the Room Before You Buy Paint
I start with daylight and a short walk around the room. Look at every wall from different angles, especially behind furniture and near windows. Note peeling paint, cracks, shiny patches, water marks, and areas where the surface feels chalky. Check trim and ceilings if they’re part of the project.
Take photographs and make a simple repair list. A dot of removable painter’s tape beside each small defect can help you find it again; avoid placing tape on fragile finishes. This quick “repair map” keeps you from repeatedly setting down the roller to fix something you missed.
Identify problems that paint cannot solve
Water stains, recurring dampness, soft drywall, and significant cracks deserve investigation before decorating. Paint cannot repair a leak or stabilize a damaged wall. If you see suspected mold, deal with the moisture source and obtain appropriate remediation guidance rather than coating over it.
Older coatings require an extra safety check. In the United States, homes built before 1978 may contain lead-based paint. The EPA’s lead-safe renovation guidance advises checking for lead and recommends a certified lead-safe contractor for work that may disturb such coatings. Don’t casually dry-sand, scrape, or power-sand suspect paint. Rules and building risks vary by location, so verify the requirements for your home.
Gather Supplies Without Overbuying
The right supplies depend on the surface, not the size of a promotional shopping list. For an ordinary sound interior wall, I’d assemble protective coverings, a mild cleaner, sponges or cloths, filler, a putty knife, appropriate sanding materials, painter’s tape, a quality angled brush, roller, tray, and extension pole. Add primer only when the wall’s condition calls for it.
Keep clean and dusty equipment separate. I put repair tools in one container and painting tools in another so grit doesn’t travel onto the fresh finish.
| Item | Why I use it | Check before buying |
|---|---|---|
| Canvas drop cloth or suitable floor protection | Catches drips and splashes | Slip resistance and floor compatibility |
| Mild cleaner and soft sponge | Removes ordinary grime | Paint and surface suitability |
| Filler, putty knife, sanding sponge | Repairs minor dents and nail holes | Drying time and repair depth |
| Painter’s tape | Protects selected edges | Surface rating and removal window |
| Primer | Seals or bonds where necessary | Compatibility with wall and topcoat |
| Brush, roller, tray, extension pole | Applies paint efficiently | Wall texture and product instructions |
Estimate the paint separately
Measure the width and height of each wall, subtract large openings if appropriate, and compare the resulting area with the coverage listed on the paint container. Account for the number of coats and textured surfaces, which may use more product. I prefer a small realistic allowance for touch-ups over buying several unneeded gallons.
Clear the Space and Protect What Stays
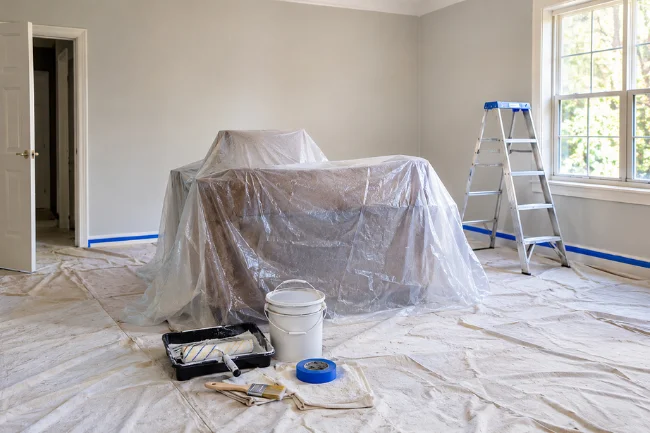
Move small furniture, wall art, curtains, and loose accessories out of the room. Push large pieces toward the center only if there’s enough safe working space, then cover them completely. Keep the doorway and an exit route clear.
Protect flooring with drop cloths or coverings suited to the surface. Canvas tends to stay put better than thin plastic underfoot, while plastic can help shield furniture from splatter. Secure protective edges so they don’t become a trip hazard. Cover vents only as appropriate for the work and your ventilation setup; never block necessary airflow or exits.
Handle outlets and hardware carefully
Remove lightweight picture hooks and label any hardware you intend to reinstall. For switch plates and outlet covers, switch off the appropriate circuit and confirm it is de-energized before working near electrical components. Never loosen wiring or paint inside electrical boxes. If you’re unsure, leave covers in place, mask carefully, or ask a qualified electrician.
Store screws in labeled bags. It’s a tiny habit that makes reassembly much less frustrating.
Clean the Walls Before Repairing or Taping
Dust and grease can interfere with adhesion, particularly around doors, light switches, and cooking areas. Start with a soft duster or vacuum attachment to remove loose debris. Then wash as needed with a mild cleaner compatible with the existing finish, following the product directions.
I work from a small inconspicuous test area before washing an entire wall. Use a damp—not soaking—sponge on painted drywall, rinse away cleaner residue where directed, and allow the wall to dry completely. Aggressive scrubbing can soften weak paint or mark flat finishes.
Manufacturer guidance from Sherwin-Williams also emphasizes removing grime and drying surfaces before taping. If the wall still feels sticky after cleaning, don’t assume primer will fix it; identify the source of the contamination first.
Watch the high-touch areas
Door frames, baseboards, and the wall beside a bedside switch often need more attention than the center of the wall. A clean cloth dragged across a seemingly spotless surface can reveal dust that a roller would otherwise pick up.
Fill Holes and Make Repairs That Disappear
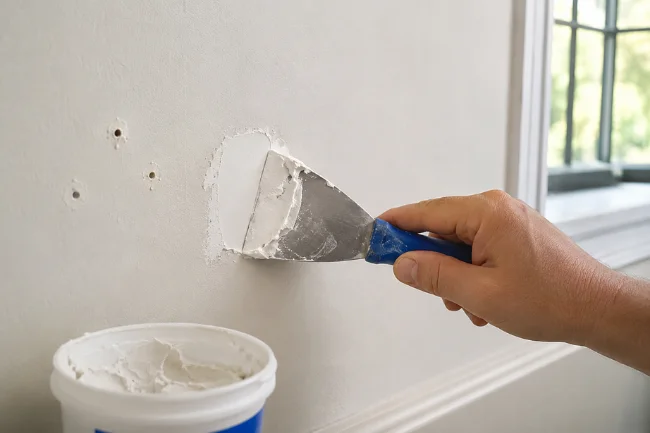
Small nail holes and shallow dents are usually manageable with a suitable interior filler. Press the material into the opening using a putty knife, remove the excess, and let it dry for the time specified on the container. Deep holes may require several applications or a proper patch rather than one thick mound of filler.
For larger drywall damage, use a repair method designed for the hole’s size. Wide or recurring cracks, crumbling plaster, and damaged board may call for professional evaluation. A cosmetic patch is not a remedy for movement, moisture, or structural problems.
Sand only where needed
On surfaces known to be safe to disturb, gently smooth fully cured repairs with an appropriate fine abrasive. Use controlled pressure; the goal is to blend the repair into the surrounding wall, not create a hollow spot. Wear the protective equipment specified for the task and control dust.
Run a hand lightly across the repaired area after cleaning. If you can feel a ridge, the finished paint may show it too. Remove all sanding dust before primer or paint. Never apply this ordinary sanding advice to suspected lead-containing coatings.
Decide When Primer Is Worth It
Primer isn’t automatically required for every repaint. A sound, clean, previously painted wall may accept a compatible topcoat without a separate primer, depending on the paint maker’s instructions. But skipping primer on bare drywall, porous patches, or stubborn stains can create uneven sheen or discoloration.
| Wall condition | Preparation priority | Primer decision |
|---|---|---|
| Clean, sound painted wall | Wash, dry, repair | Follow topcoat label; separate primer may not be needed |
| New drywall or porous filler | Remove dust, seal surface | Use suitable drywall or problem-area primer |
| Glossy or hard-to-bond coating | Clean and prepare as directed | Consider compatible bonding primer |
| Stained wall after source is fixed | Remove contamination, dry | Use appropriate stain-blocking primer |
| Peeling or damp surface | Resolve cause and stabilize | Do not use primer as a shortcut |
Spot-prime repairs to avoid flashing
Fresh filler absorbs paint differently from an older coated wall. Under side lighting, repaired spots may look duller or shinier—an effect often called flashing. Spot-priming porous repairs with a compatible primer can help create a more uniform finish. Follow drying and recoating instructions rather than judging readiness by touch alone.
When changing from a very dark to a pale color, a suitable primer or additional topcoats may improve coverage. Check the specific system you plan to use; “paint and primer in one” on a label doesn’t eliminate every preparation need.
Caulk Gaps and Mask the Right Edges
Small gaps where painted trim meets a wall can sometimes be filled with compatible paintable caulk. Clean the joint, apply a restrained bead, smooth it, and allow the specified cure or paint-ready time. Don’t caulk a crack that needs structural repair, and don’t assume all silicone sealants can be painted.
For painter’s tape, begin with clean, dry trim. Press the edge down evenly, especially around corners, but don’t force adhesive onto delicate wallpaper, unstable paint, or an unsuitable finish. Choose tape rated for the surface, and follow its removal window.
I would tape tricky boundaries and protect hardware rather than tape every straight edge automatically. A steady angled brush can often produce a clean line with less setup.
Prepare the Air and the Work Area
Open suitable windows when outdoor conditions allow, and use safe ventilation that carries fumes outdoors without blowing dust onto wet paint. Read the paint’s safety instructions; low-VOC labeling doesn’t mean a room needs no ventilation.
The EPA’s indoor-air guidance recommends fresh air when painting or using products that may release volatile organic compounds. Keep children, pets, and people sensitive to fumes away from the work area. Don’t paint around open flames or ignition sources, and follow the coating’s temperature and humidity limits.
Set up a stable ladder or step stool if needed, position the tray away from walkways, and make sure there is enough light to see missed spots. A portable work light can reveal defects hidden by soft overhead lighting.
Use the Side-Light Test Before Opening the Paint
Here’s the inspection I consider especially useful: shine a lamp almost parallel to the wall rather than straight at it. Side lighting throws tiny ridges, dents, and rough patches into relief. Mark and correct only the defects that are likely to remain visible after painting.
Then check three things: the wall is dry, patches are fully cured, and your cloth comes away clean. This is a better readiness test than deciding the wall “looks fine” from the doorway.
Prepare the sequence for the first coat
Plan which wall you’ll start on and where you’ll finish. Keep a brush, roller, clean rag, and tray within reach. Stir paint as directed and use the recommended roller nap for the wall texture. Cut in an edge, then roll the adjacent section while workable so the transition blends; maintain a wet edge and respect drying times.
I avoid opening every can at once. A tidy setup reduces spills and stops brushes from picking up dust while repairs are still underway.
Allow Enough Time Instead of Racing the Clock
A quick repaint can still involve multiple drying stages. Cleaning, patching, primer, caulk, and topcoats each have their own instructions. Humidity, temperature, airflow, and repair depth change the timing, so no universal “paint-ready in one hour” promise is reliable.
If time is tight, I split the project into preparation day and painting day. That gives repairs time to cure and lets me return with fresh eyes to catch anything I overlooked. Don’t rush a second coat simply because the surface feels dry; follow the stated recoat interval.
Prevent common preparation mistakes
The mistakes I watch for are straightforward: taping dusty trim, painting over damp patches, leaving sanding grit on the wall, overfilling dents, ignoring water stains, and using incompatible products. Each can undo the time saved by skipping a preparation task.
Another easy mistake is judging repairs only under overhead light. Check from the doorway and beside the window, where imperfections tend to show after the room is furnished again.
Clean Up Without Damaging the Finish
Remove masking tape according to the tape and paint manufacturers’ timing instructions. Pull gently at the recommended angle; if a dried paint film bridges the tape, follow suitable guidance for scoring the edge without damaging the substrate. Reattach covers and hardware only when safe and sufficiently dry.
Keep a small labeled container of leftover paint for future touch-ups, following storage directions. Don’t pour paint or cleaning solvents into storm drains. Check your local waste authority or a program such as PaintCare for accepted disposal or recycling options.
If you’d rather make a change without painting, my renter-friendly bedroom makeover ideas offer portable ways to refresh a room without touching the walls.
Frequently Asked Questions About Preparing a Room for Painting
Do I need to wash walls before painting?
Usually, yes, wherever dust, grease, or grime is present. Use a suitable mild cleaner, remove residue as directed, and let the wall dry fully.
Should I sand walls before painting?
Not every wall needs sanding. Smooth safe-to-disturb repairs and prepare glossy surfaces as directed, but avoid sanding paint that may contain lead.
Do I need primer before painting a room?
Not always. Bare drywall, porous repairs, stains, or difficult surfaces often benefit from a compatible primer; follow the paint manufacturer’s guidance.
How long should I wait after cleaning walls to paint?
Wait until the walls are completely dry. The time varies with moisture, temperature, ventilation, and the cleaning method.
Is it better to tape first or paint edges first?
If using tape, apply it to clean, dry surfaces before painting edges. Otherwise, cut in carefully with an angled brush and then roll nearby areas.
Start Painting Only When the Room Is Ready
Knowing how to prep a room for painting means giving the surface—not just the new color—your attention. I would begin with a wall inspection today, gather only the materials the room needs, and leave the first coat until every repair is dry, smooth, and clean. That preparation is what gives the new paint a fair chance to look its best.
Looking for more affordable ways to improve your home? Explore my Budget Makeovers collection for practical ideas.

Owen Mercer writes about interior painting, wall preparation, and practical DIY finishing techniques for DIY Home Makeovers. With 7 years of experience in painting projects, he focuses on choosing the right tools, preparing surfaces properly, and avoiding common mistakes to help readers achieve smooth, lasting results.